Download & Installation
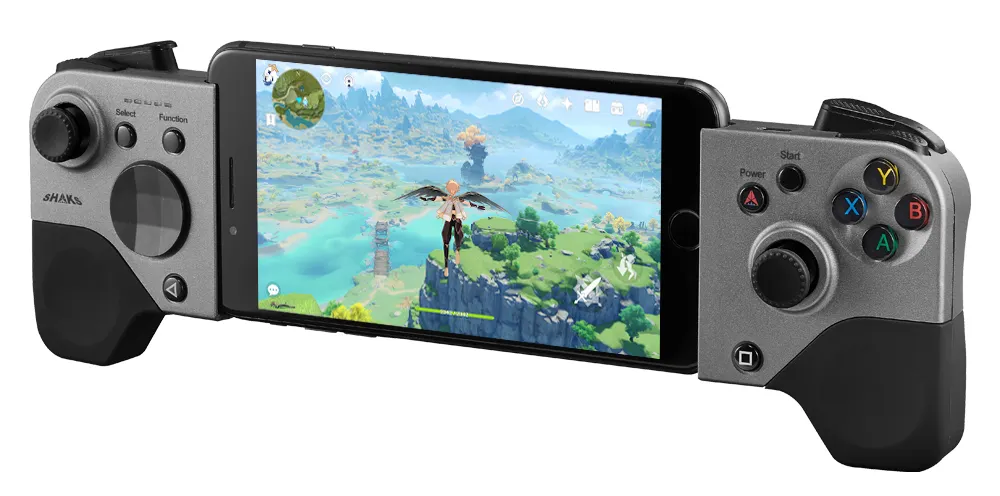
The SHAKS Gamehub application is designed for a better gaming experience using SHAKS higher-end series S2i, S3x, S5x and S6 including the sniper, turbo, mouse setting, calibration of the analog stick, mapping feature, self-test, and FW remote update, etc. Also, it provides a compatible game list, its playing tips, manual, and tutorials. Please note that SHAKS has different application per OS, and its feature is different from each other according to OS & device.
SHAKS keeps developing new features, and updates via firmware or app release. Please keep updating your gamepad and app up to date always for 100% using SHAKS feature sets.
Download & Install
Search "SHAKS Gamehub" on Google Play and download it. Alternatively, use the below address or QR code to download the app.
Model compatible with SHAKS GameHub App
Android SHAKS GameHub application is supporting S2/S3/S5/S6 and future models.
Any time, if disconnection appears, please check auto-sleep mode. When the gamepad get into sleep mode to save battery, it also disconnects its BT connection with the phone and its companion app. . Simply power on again, it will be paired again automatically
Log-in & App Permission Information
Privacy and Service Agreement
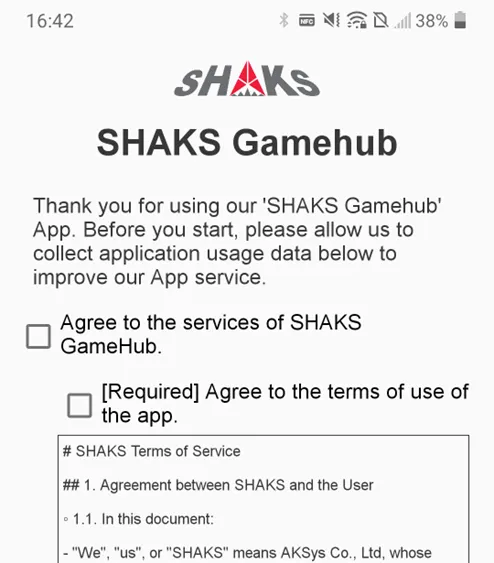
It is required to consent to the application service agreement and privacy policy. SHAKS gives the most priority to protect the privacy of our clients.
Please accept to receive marketing information/news from SHAKS by clicking the box.
Log-in
Google Gmail ID and Guest are allowed to access. but Guest log is limiting its use of GameHub online service.
Bluetooth Permission (for Android 12)
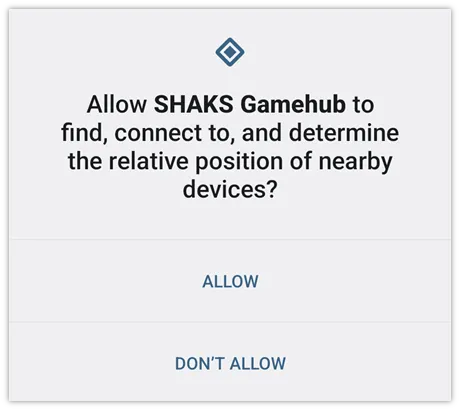
This app requires Bluetooth permission. Our products can be configured the product via Bluetooth technology. Please allow permission for Android 12 to find, connect and determine nearby devices requested. If you do not allow this, you will not be able to use most of the features of the SHAKS Gamehub app.
Home Screen
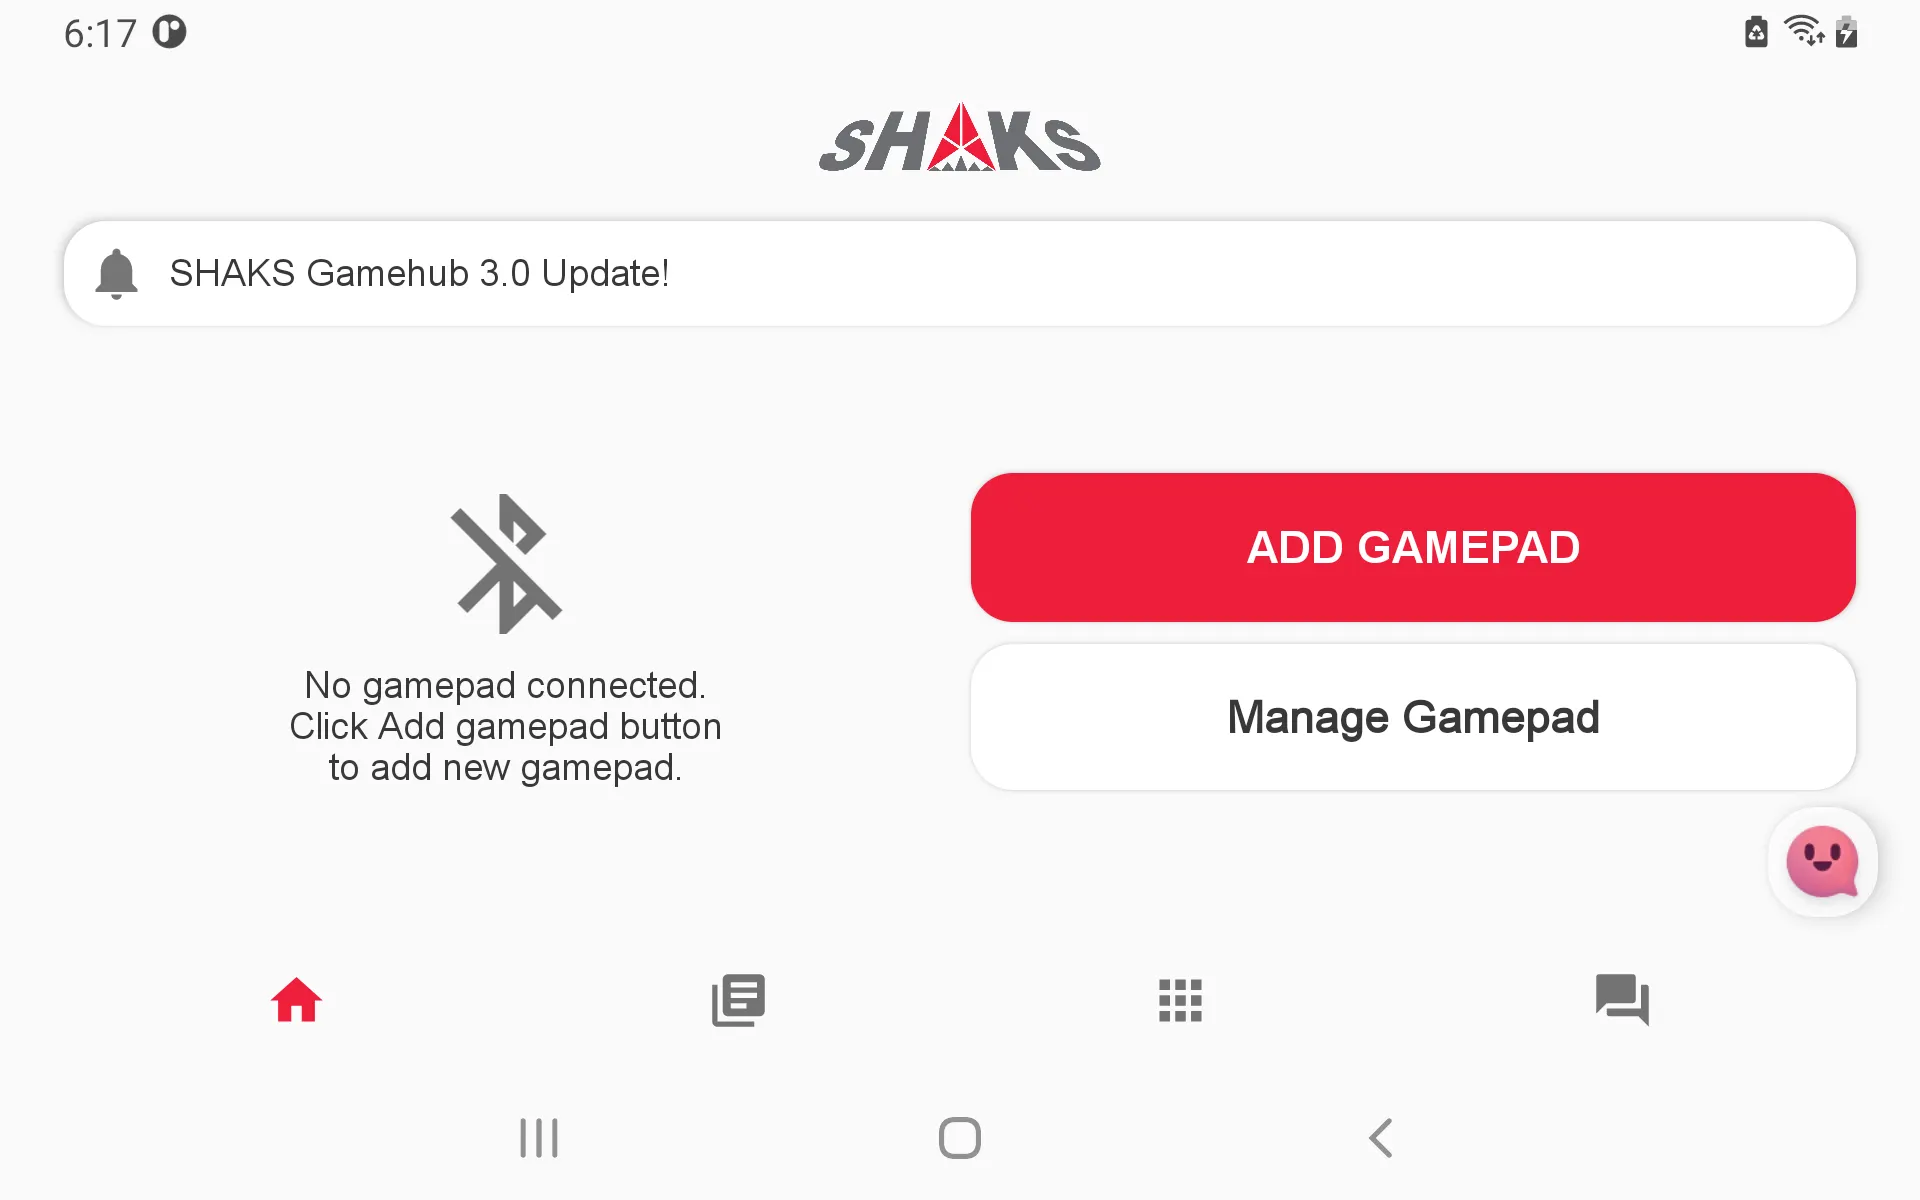
This screen is not shown without the Gamepad.
Please connect the Gamepad with “ADD GAMEPAD” button.
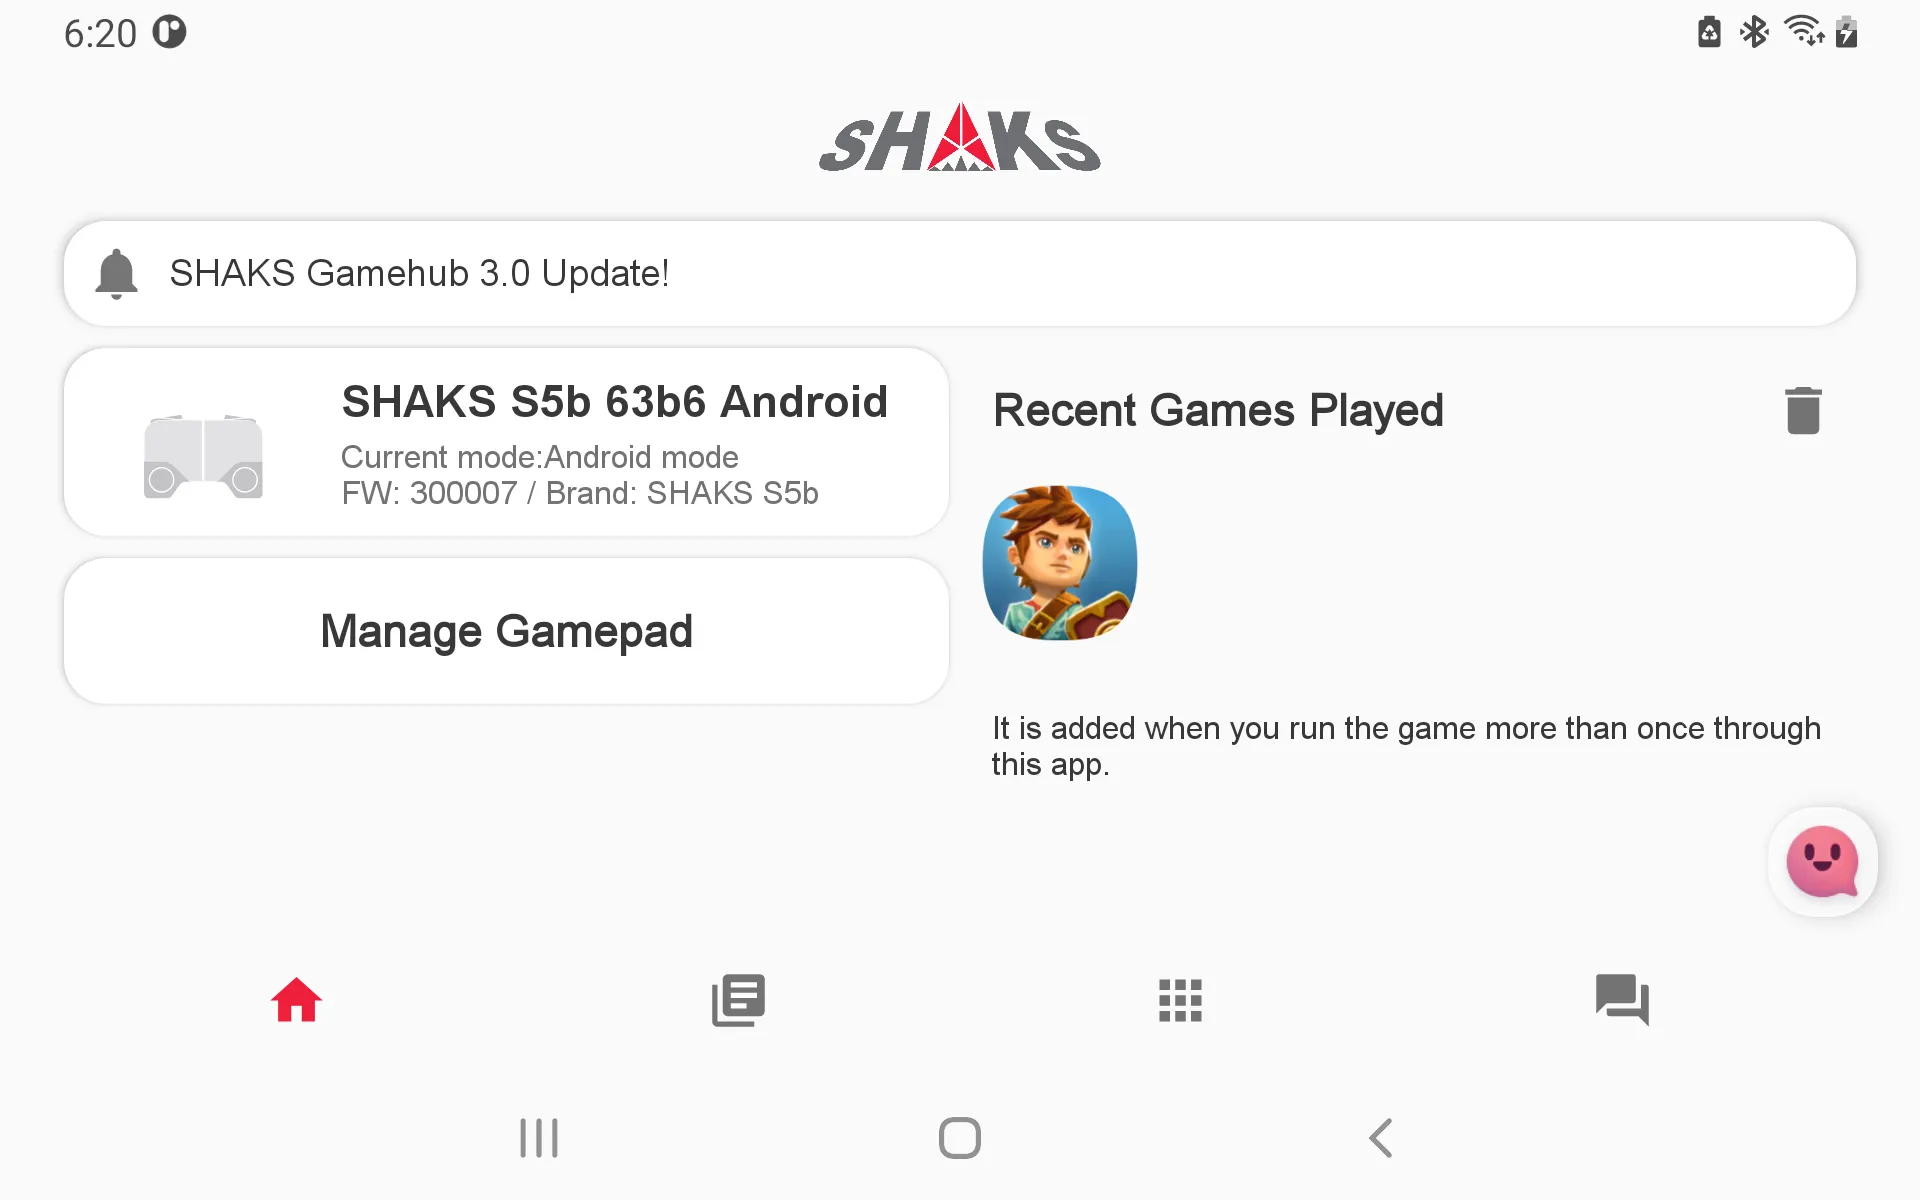
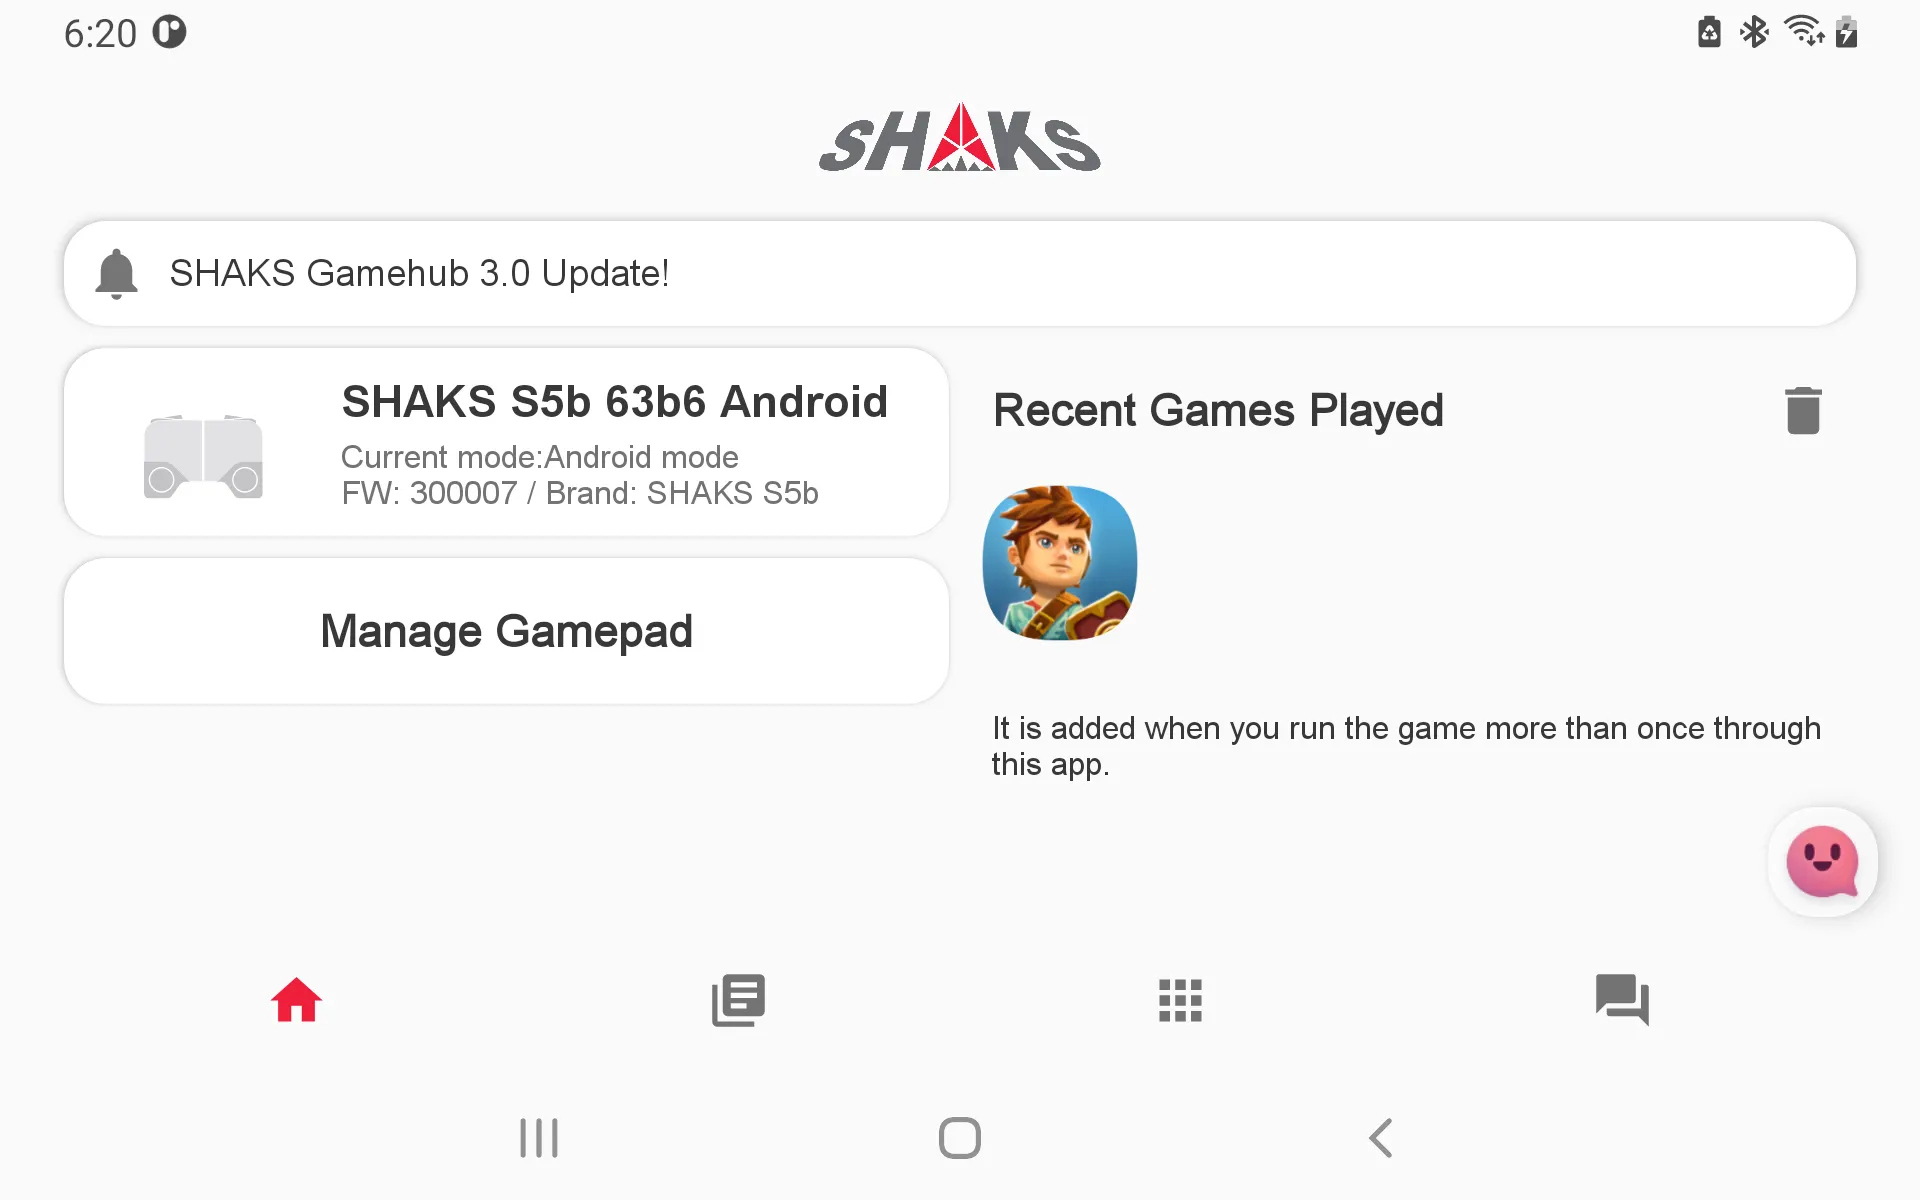
If the Gamepad is connected like in the picture, you can set up the Gamepad again, or play the game again that you Recent Game Played.
1.
You can open the Gamepad pop-up page by selecting the SHAKS Gamepad section.
2.
You can open the “Manage Gamepad” to see the input devices.
3.
You can quickly re-run games that you've already played with “Rent Games Played”.
a.
You can quickly deliver pre-set things to the Android game app and mapping app.
Add GamePad Connections
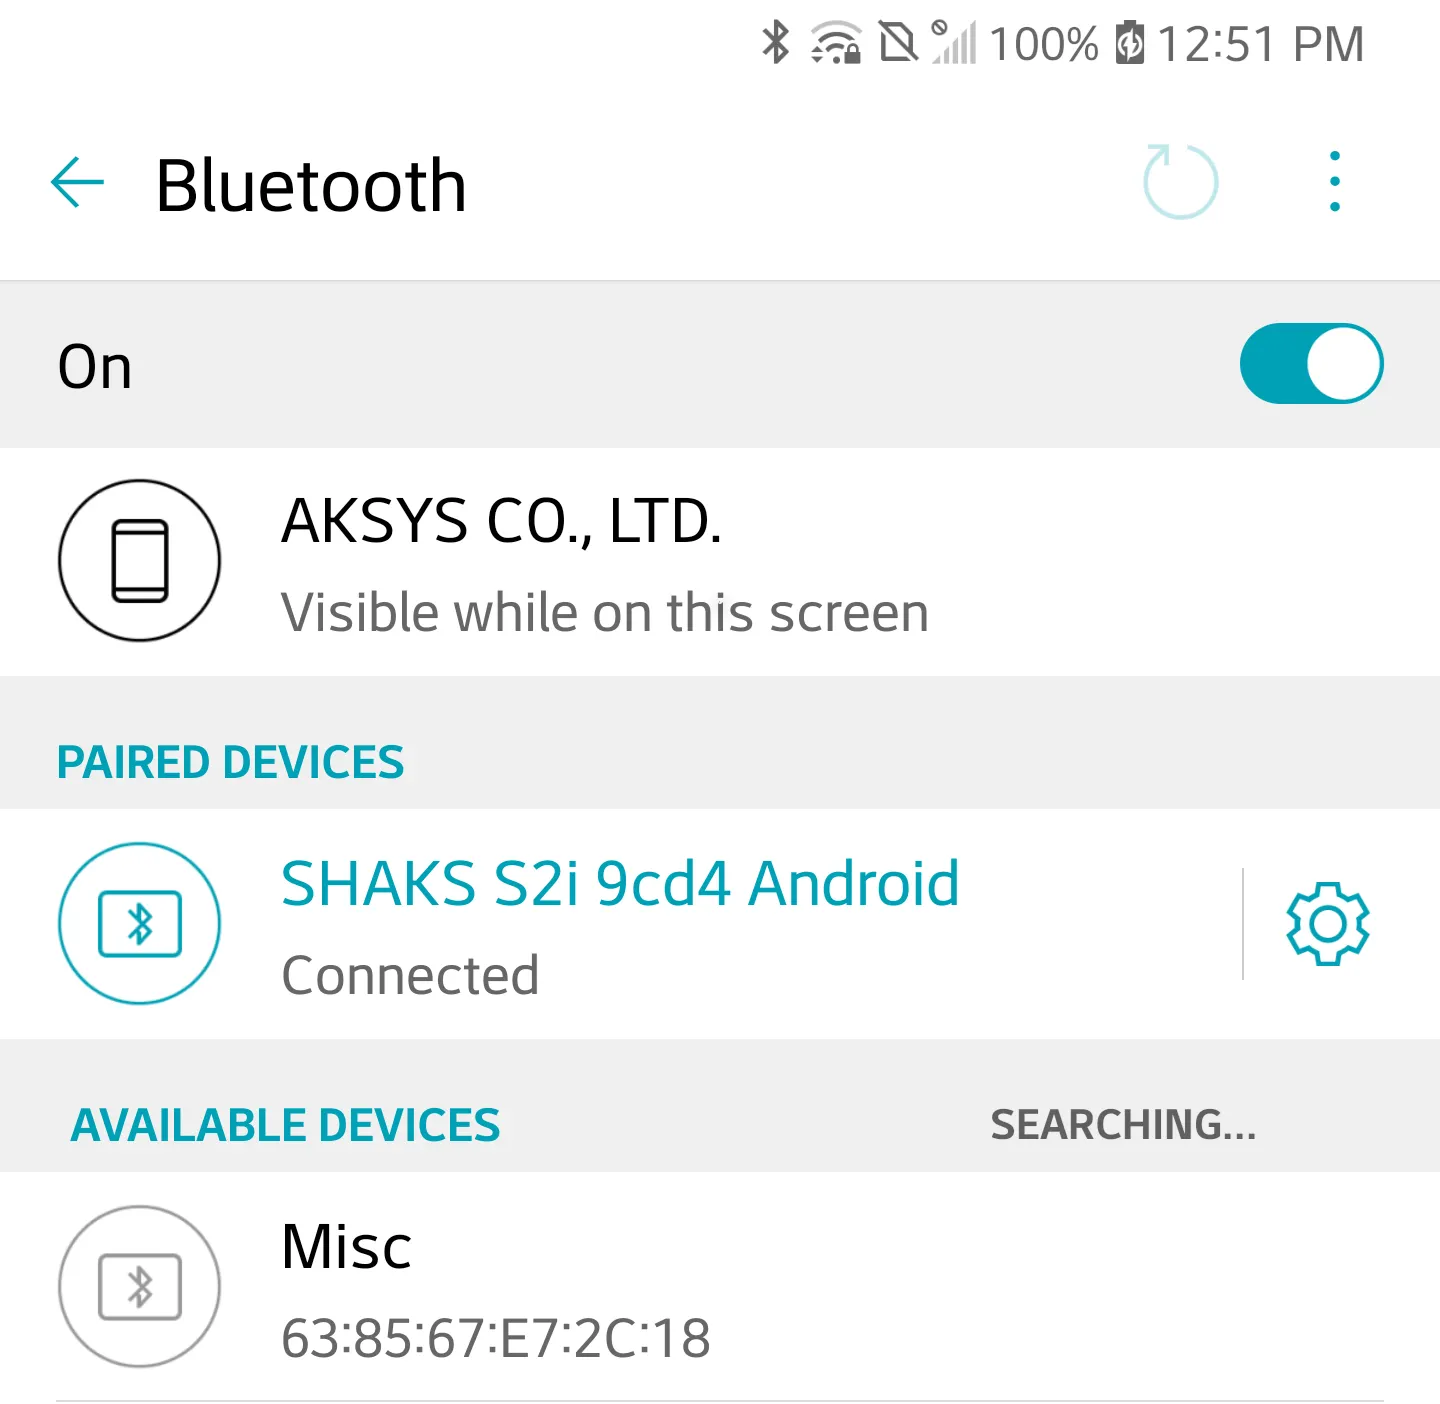
Press the 'Add Gamepad' button to go to the Bluetooth settings screen on Android.
Select and connect the SHAKS Gamepad from the Bluetooth device.
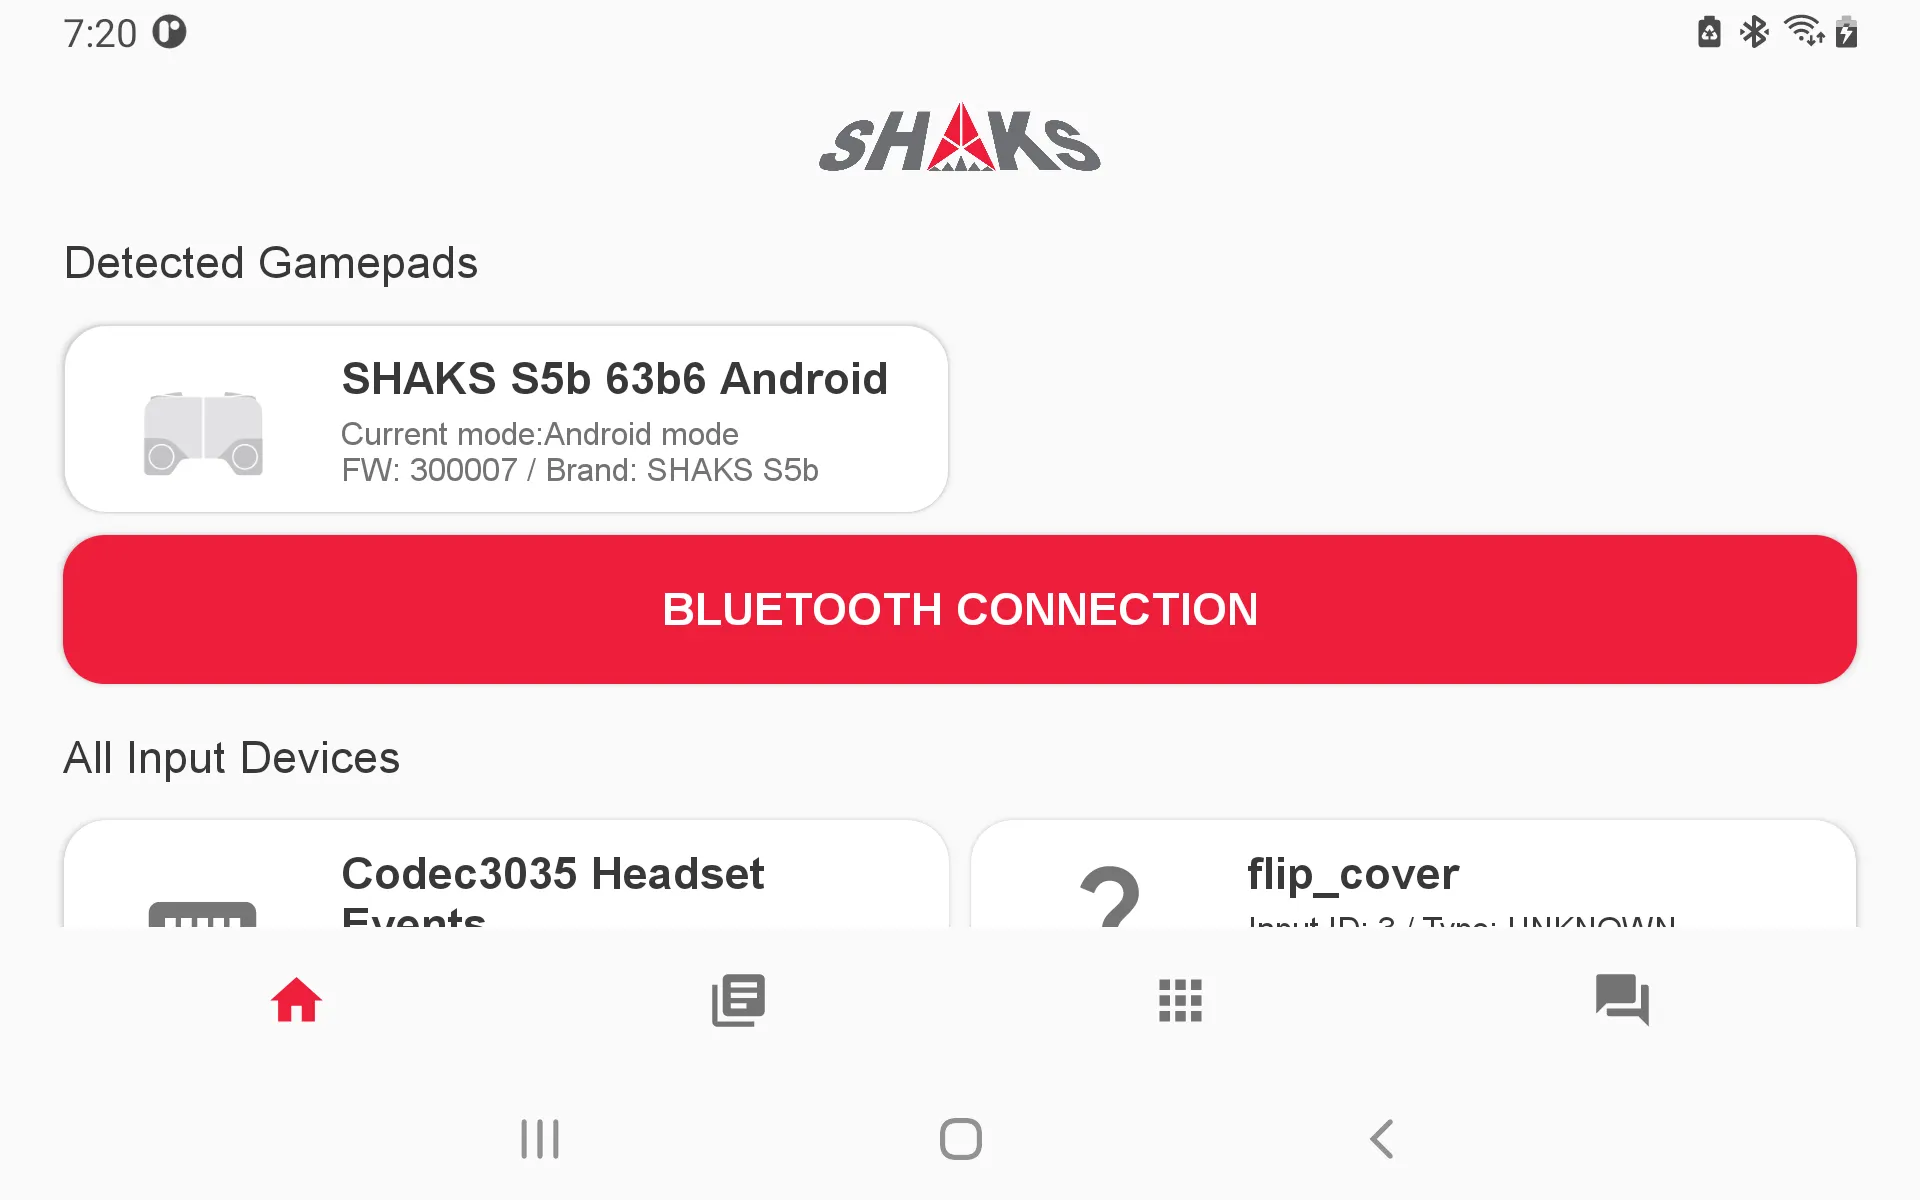
It shows the model name, ID, FW Version of the connected gamepad.
If it needs to update to the latest FW or any trouble in connection, the below pop message appears.
Any connection error
Gamepad mode is changed but the phone connects it with the previous mode.
This message pop-up in case the mode of the gamepad is different from what the phone remembers. In 99% of the case, this happens, without deleting the connection log at the phone BT setting, it connects with the different modes of the gamepad. It can be solved, release BT connection by pressing the gamepad icon for 2-3 seconds on the screen and reconnecting it.
Although is it the same Android phone, mapping and android mode is different from each other. If you use both by turn, please delete the pairing log and make newly pair again.
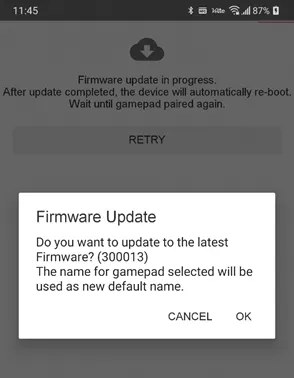
The low firmware version of the gamepad
Touch the menu and you can enter into the firmware update feature.
If gamepad firmware is out-of-data, this message pops up.
Almost all of the gamepads you've seen on the SHAKS Gamehub appear here.
Although third-party controllers are also displayed, the Sharks Game Hub application is currently only available for SHAKS GamePad.
Even though you have connected the gamepad, it's not recognized well, check out the All Input Devices section. Here you can see all the types of input devices available on your smartphone.
Gamepad Window
Menu for various settings for gamepad or SHAKS Gamehub app.
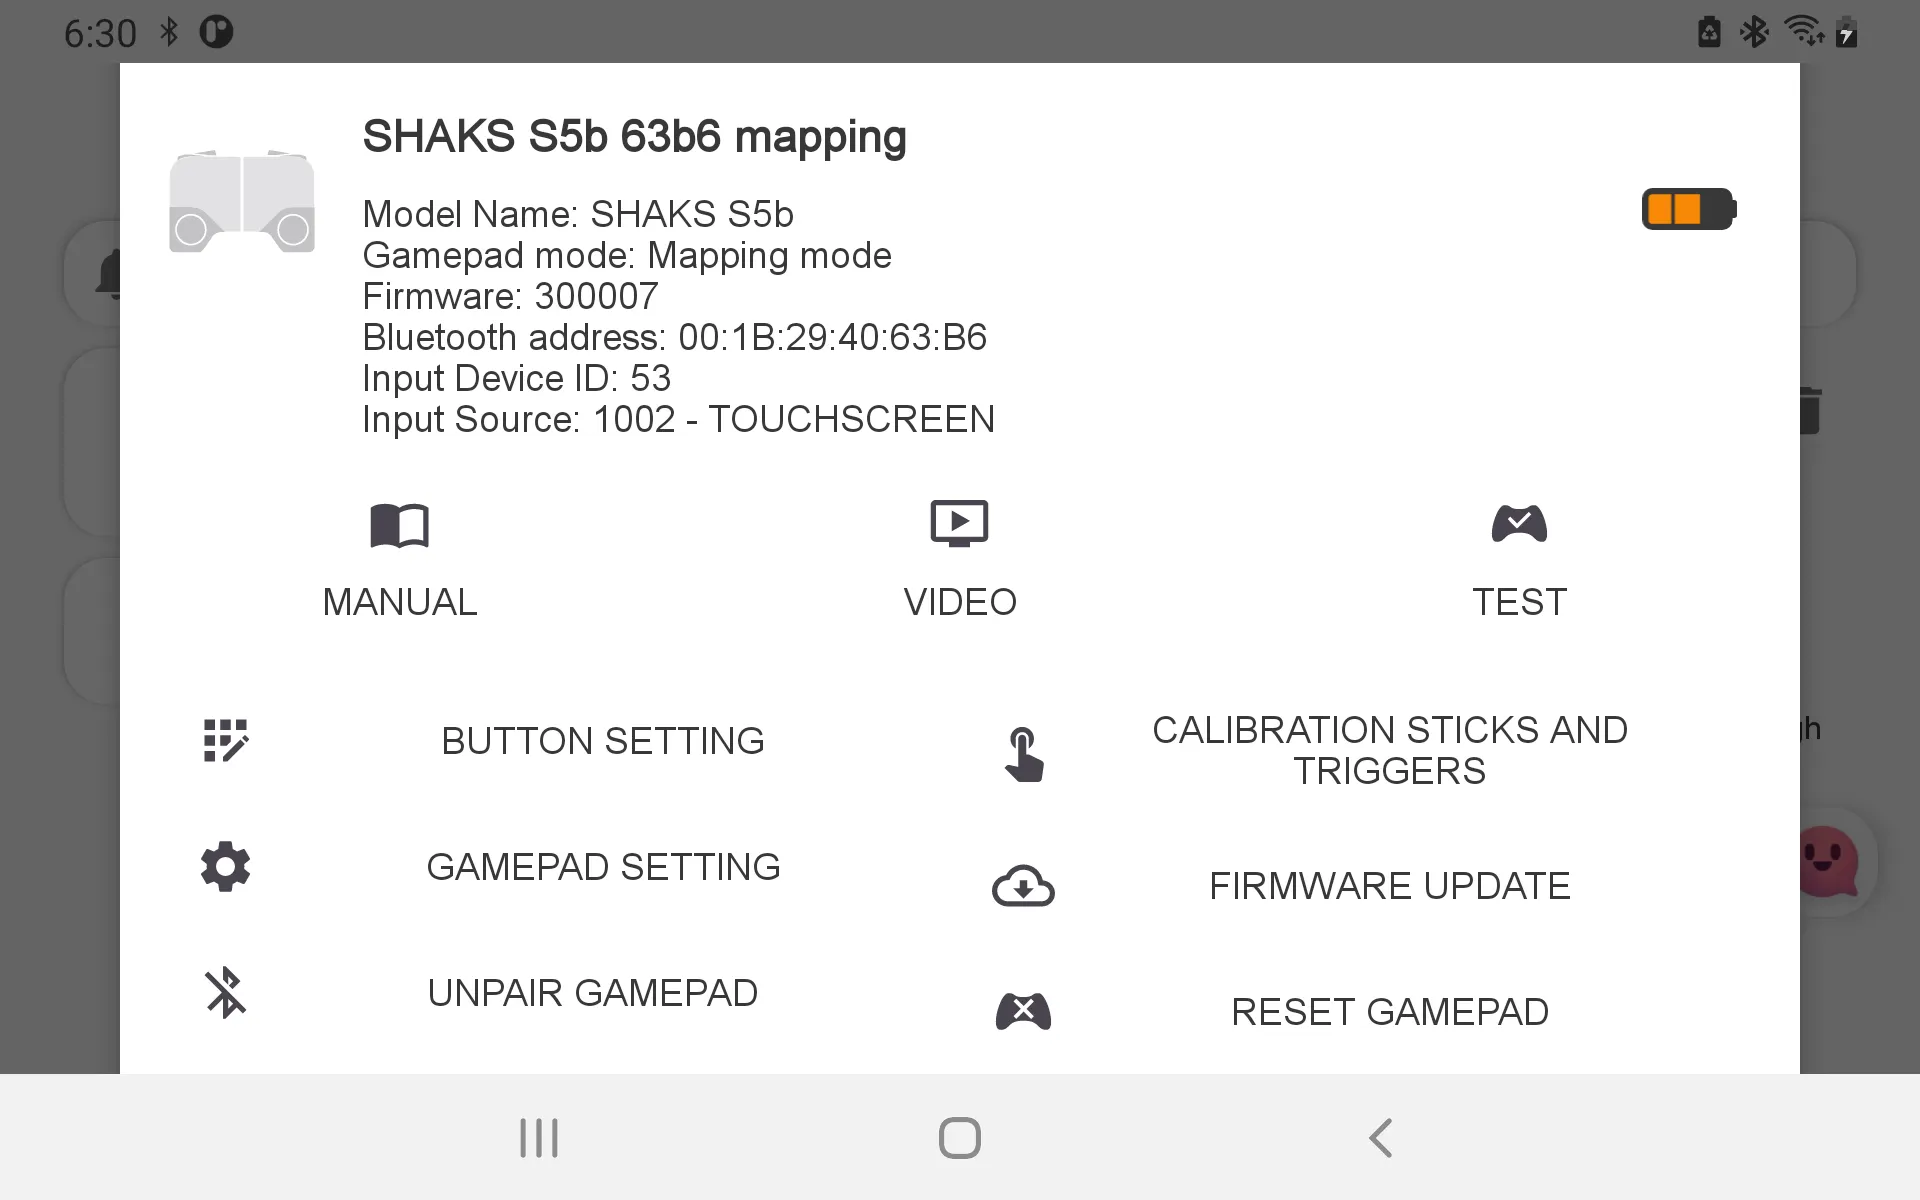
If you touch the Gamepad, you can check the detailed information as shown in the picture.
Touch the comment section of the SHAKS Gamepad to find more information when you connect to the Gamepad.
The information available in the Description Section:
There are various manuals related to the Gamepad as followings;
•
MANUAL → Gamepad model user guide (on Web.)
•
VIDEO → Gamepad model user guide in the video (on Web.)
•
TEST → Gamepad button/stick test
•
Button Setting → Gamepad button settings
•
•
GAMEPAD SETTING → Power saving or calibration settings
•
FIRMWARE UPDATE → Latest firmware version update.
•
UNPAIR GAMEPAD → Disconnect the pairing and remove it from the Bluetooth-connected device.
•
RESET GAMEPAD → Initialize all information on the gamepad and remove it from the Bluetooth-connected device.
◦
If the Gamepad is initialized, the Gamepad will be shut down immediately.
◦
Turn off all settings and Bluetooth connection information that the Gamepad remembers.
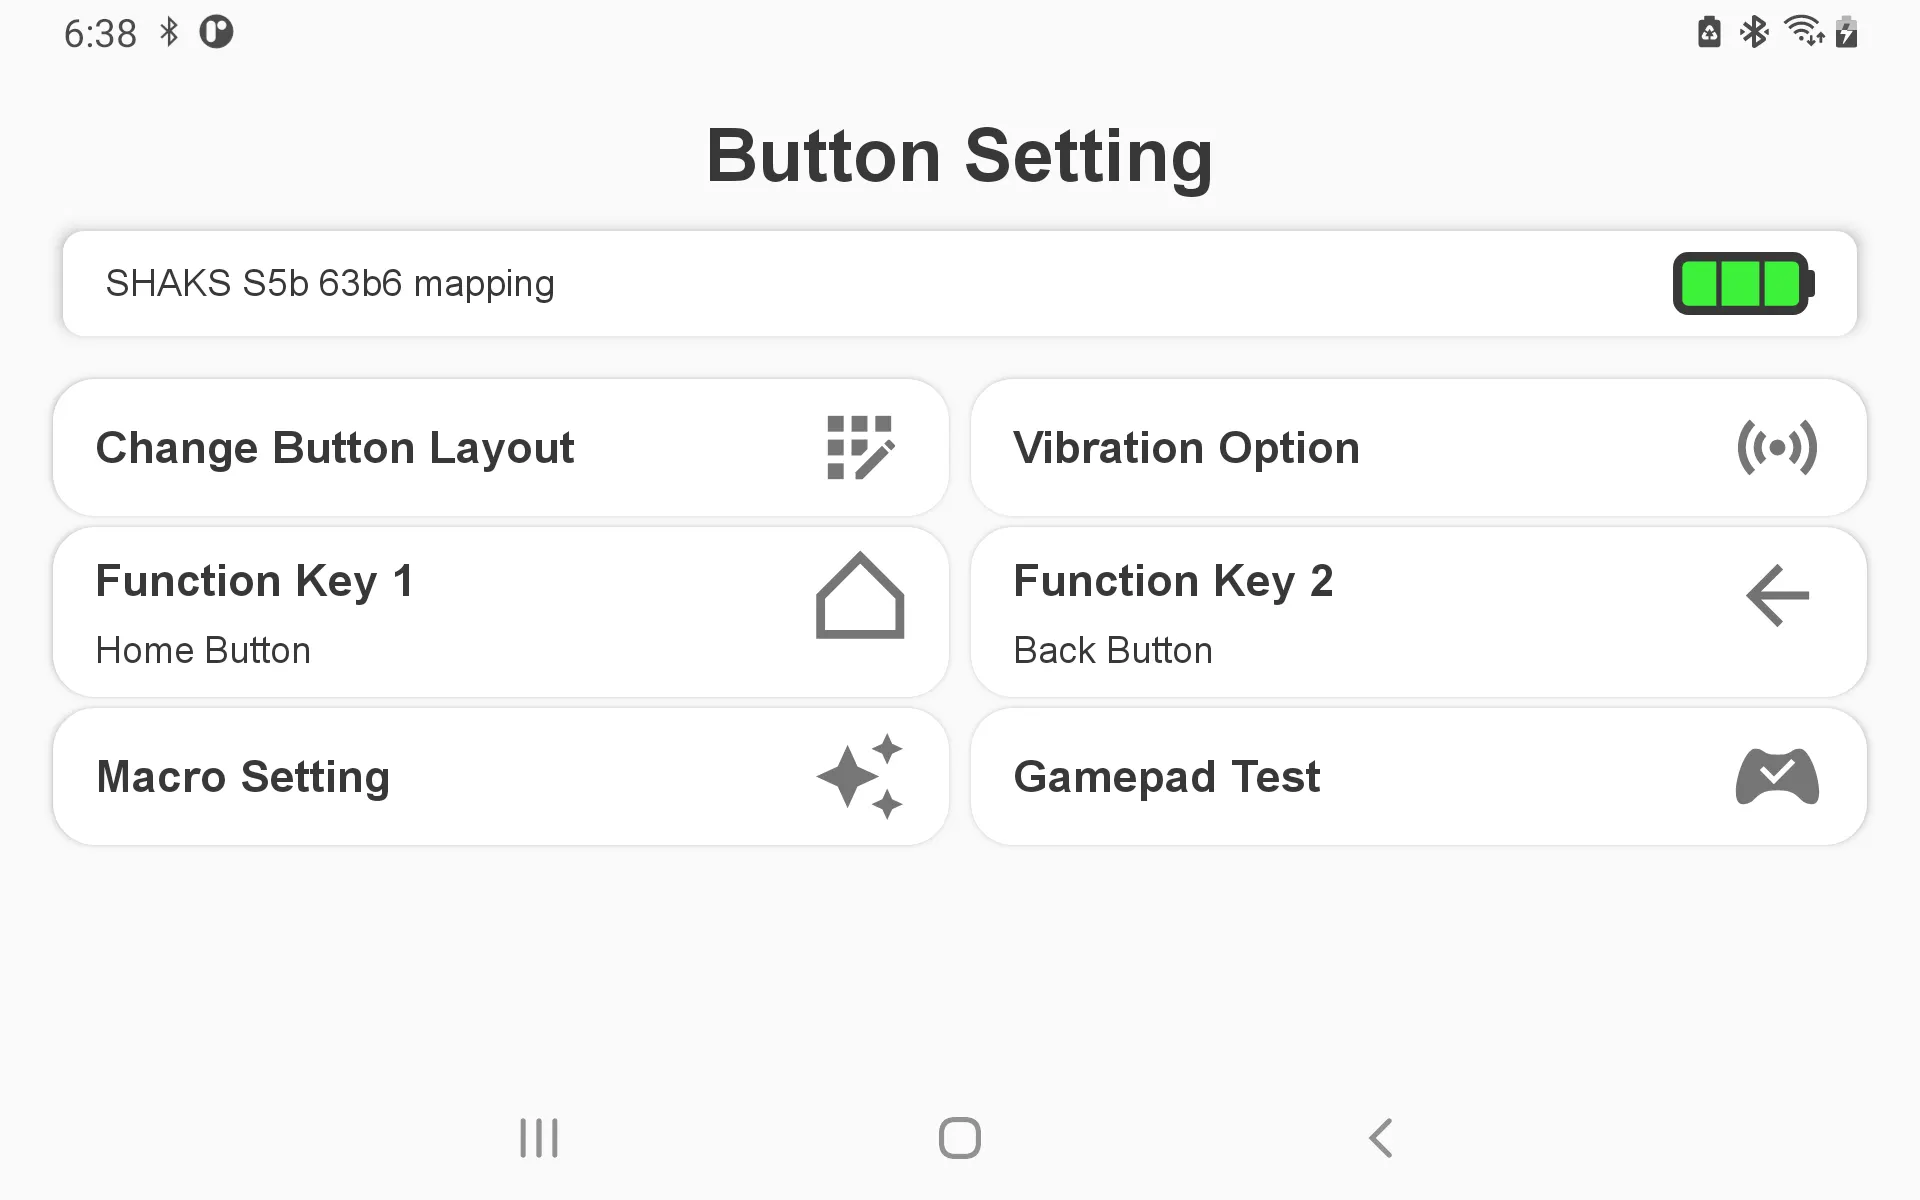
Button Setting
You can change various information on the Gamepad that you can do when you press the button on the Gamepad.
1.
Change Button Layout (Android / Windows mode only)
When you want to change the placement of buttons, this feature allows you to change the placement of buttons arbitrarily.
For mappings, make changes to each mapping data that you want to use instead of this feature.
2.
Vibration Option
You can force vibration to be activated on the gamepad each time you press the button.
3.
Function Key 1 / Function Key 2
4.
Macro Setting
5.
Gamepad Test
Button Setting is available on Android and Windows.
•
•
In mapping mode, change the placement of buttons on the screen directly.
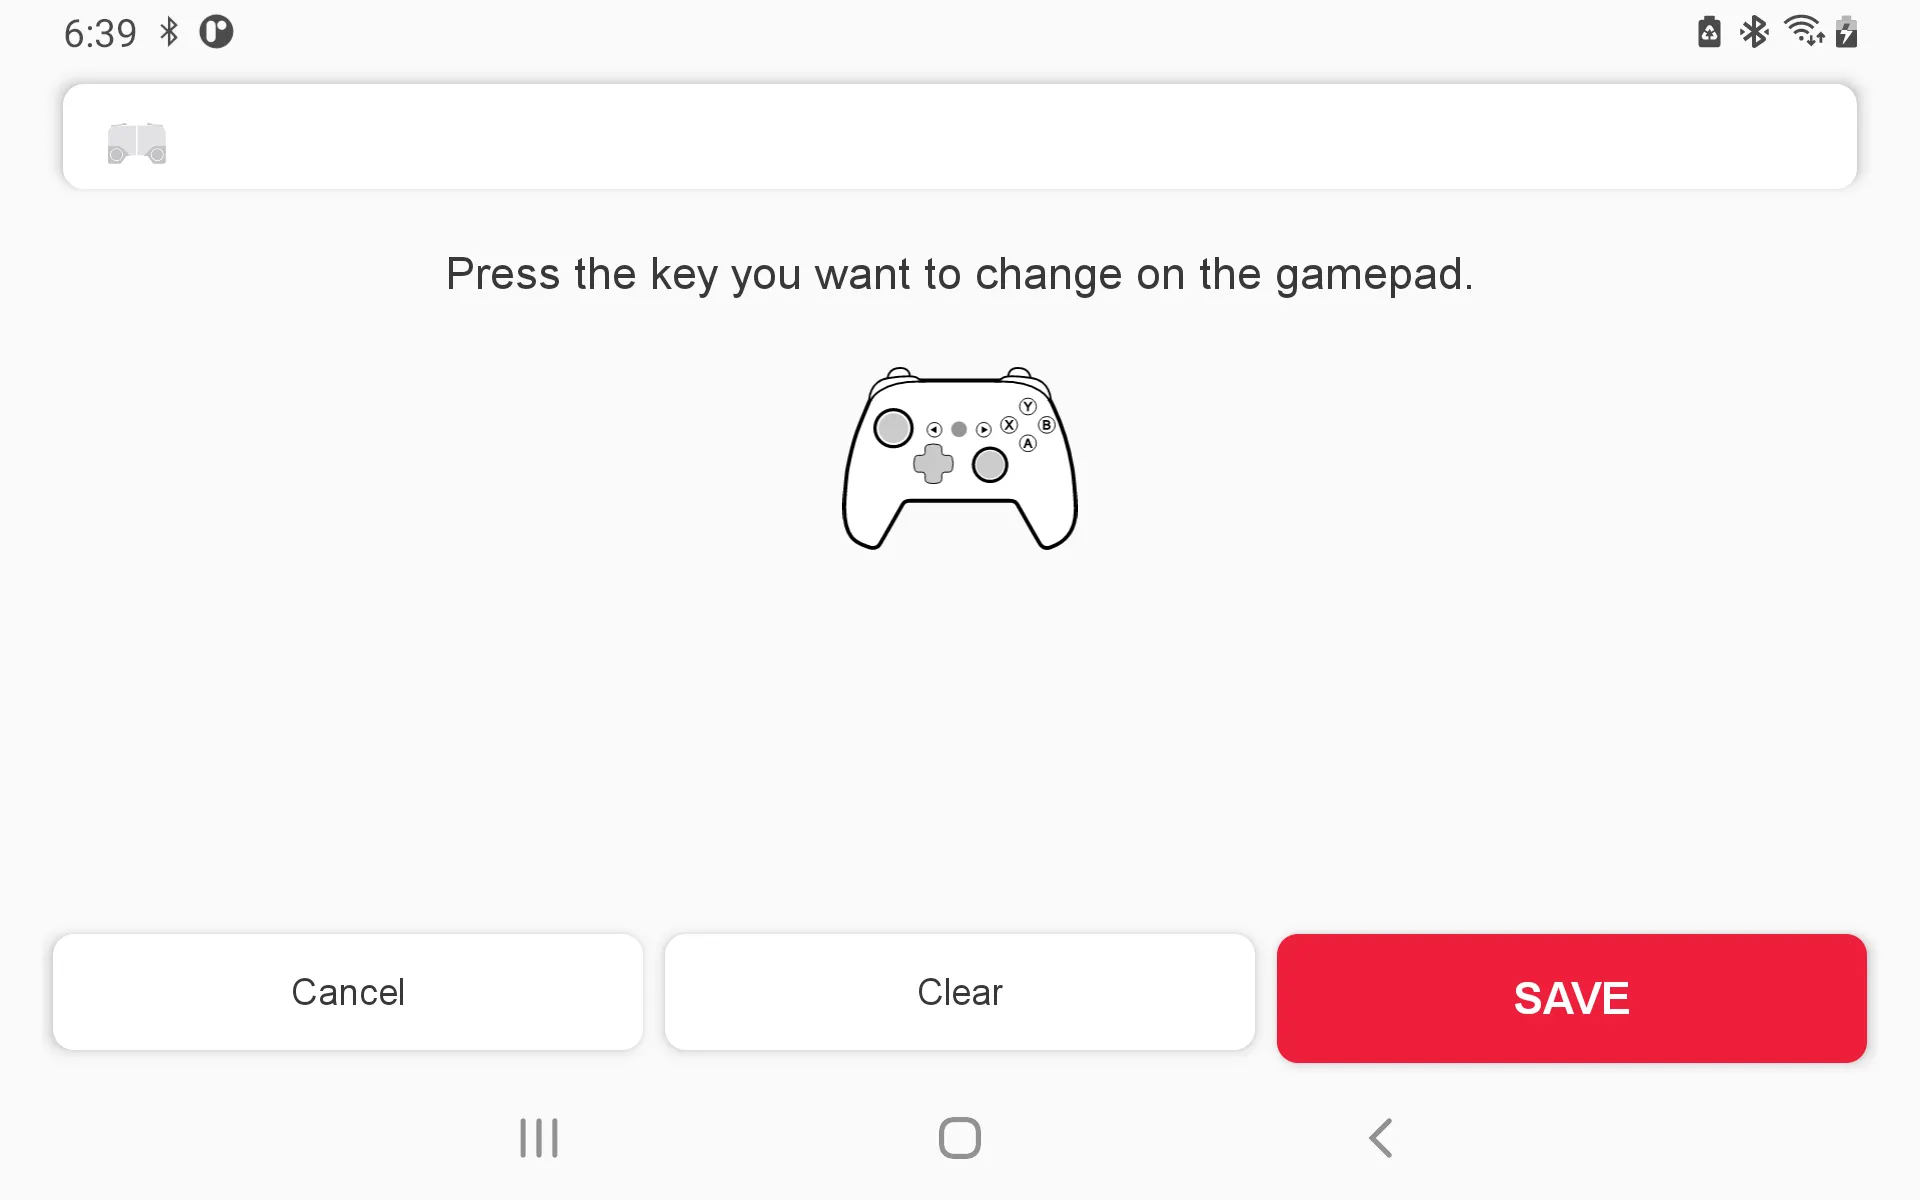
Change KEY placement 
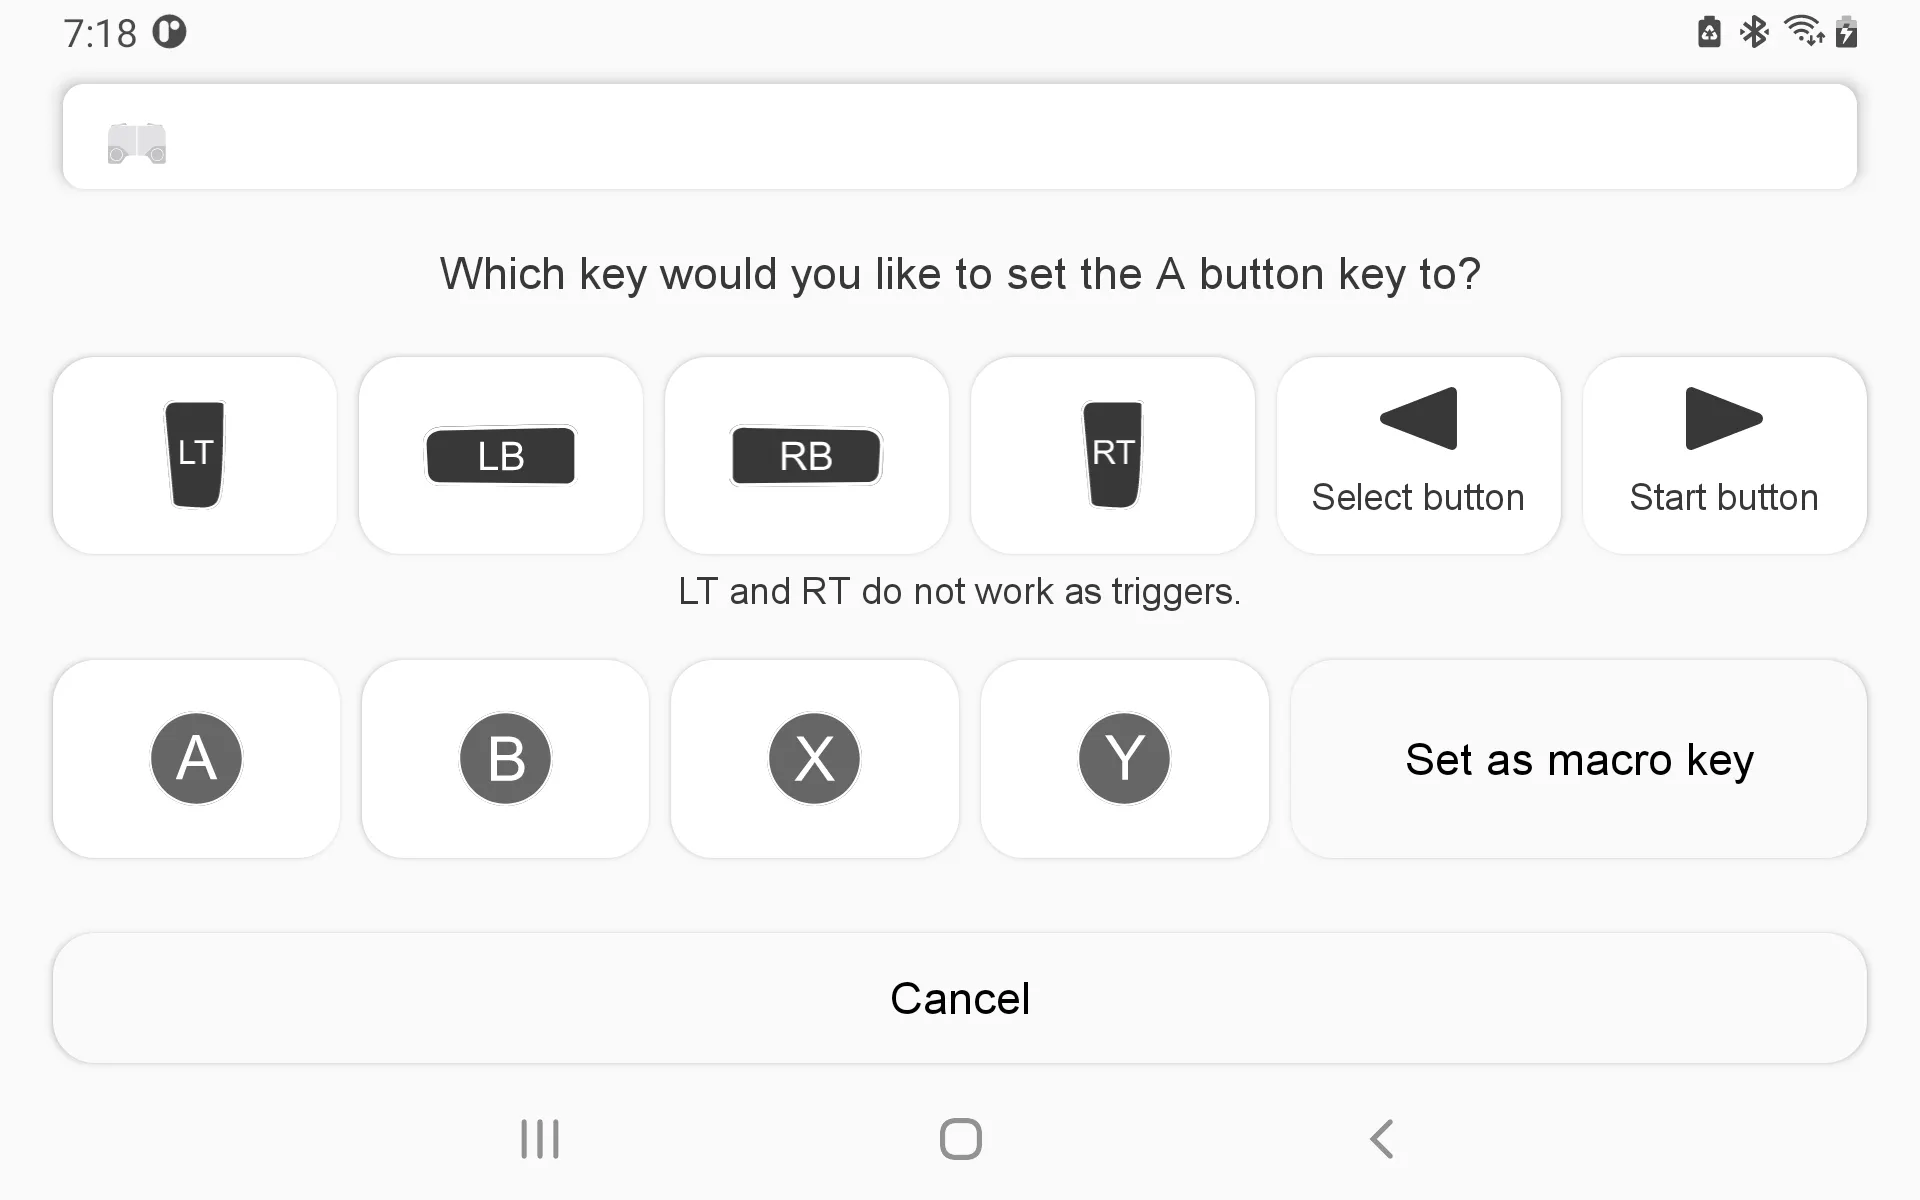
To change the placement of a Key, you can change the placement by pressing the key on the Gamepad and selecting the key you want.
Even if you have already set it, it will return to the default value while this screen is open. When you cancel, initialize, or save, the button array on the gamepad works as a set.
•
SAVE → Saved with the replaced key.
•
Clear → Returns all keys to their default values. Macros are also deleted.
•
Cancel → Reverts to the previously saved places.
1.
When using LT, RT after changing the button
a.
When the LT, RT buttons are set to different buttons, or when the other keys are applied to the LT, RT buttons, they all behave like normal buttons.
b.
As the trigger values operate only at a minimum and maximum values, triggers with only intermediate values cannot operate.
2.
Macro key setting
a.
When you activate a set of buttons, make it work as a macro instead of a set of buttons.
b.
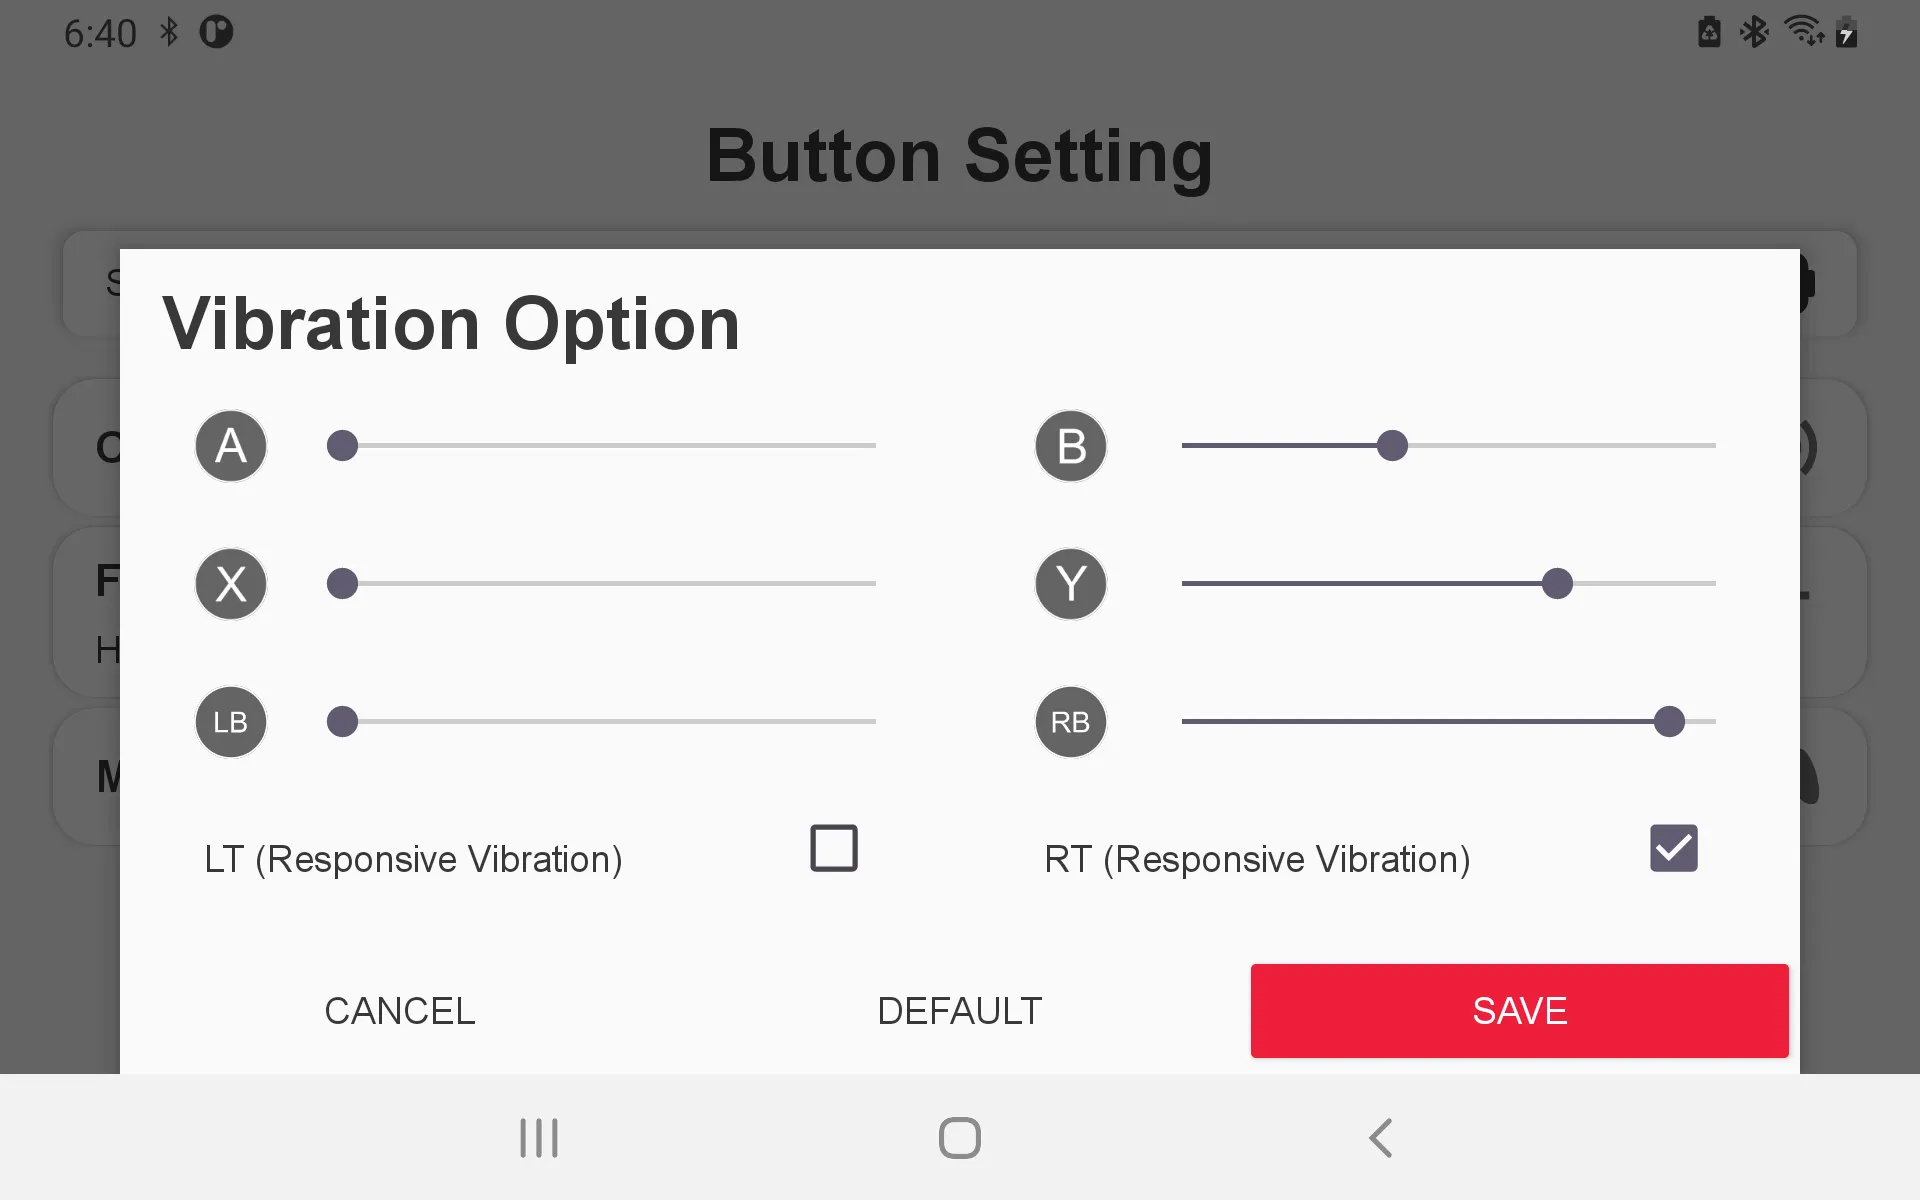
Button Vibration Option
Allows vibration to be activated each time the button on the game pad is pressed.
•
Normal button vibration
When you adjust the vibration strength of each button, a short vibration is activated when pressed..
Push to the left end to turn off the vibration.
•
LT/RT Responsive Vibration
In the case of LT and RT, you can determine the degree of pressing, so the intensity of vibration continues to change according to the degree of pressing on the Gamepad.
Unlike normal buttons, the vibration will continue to operate when the button is pressed.
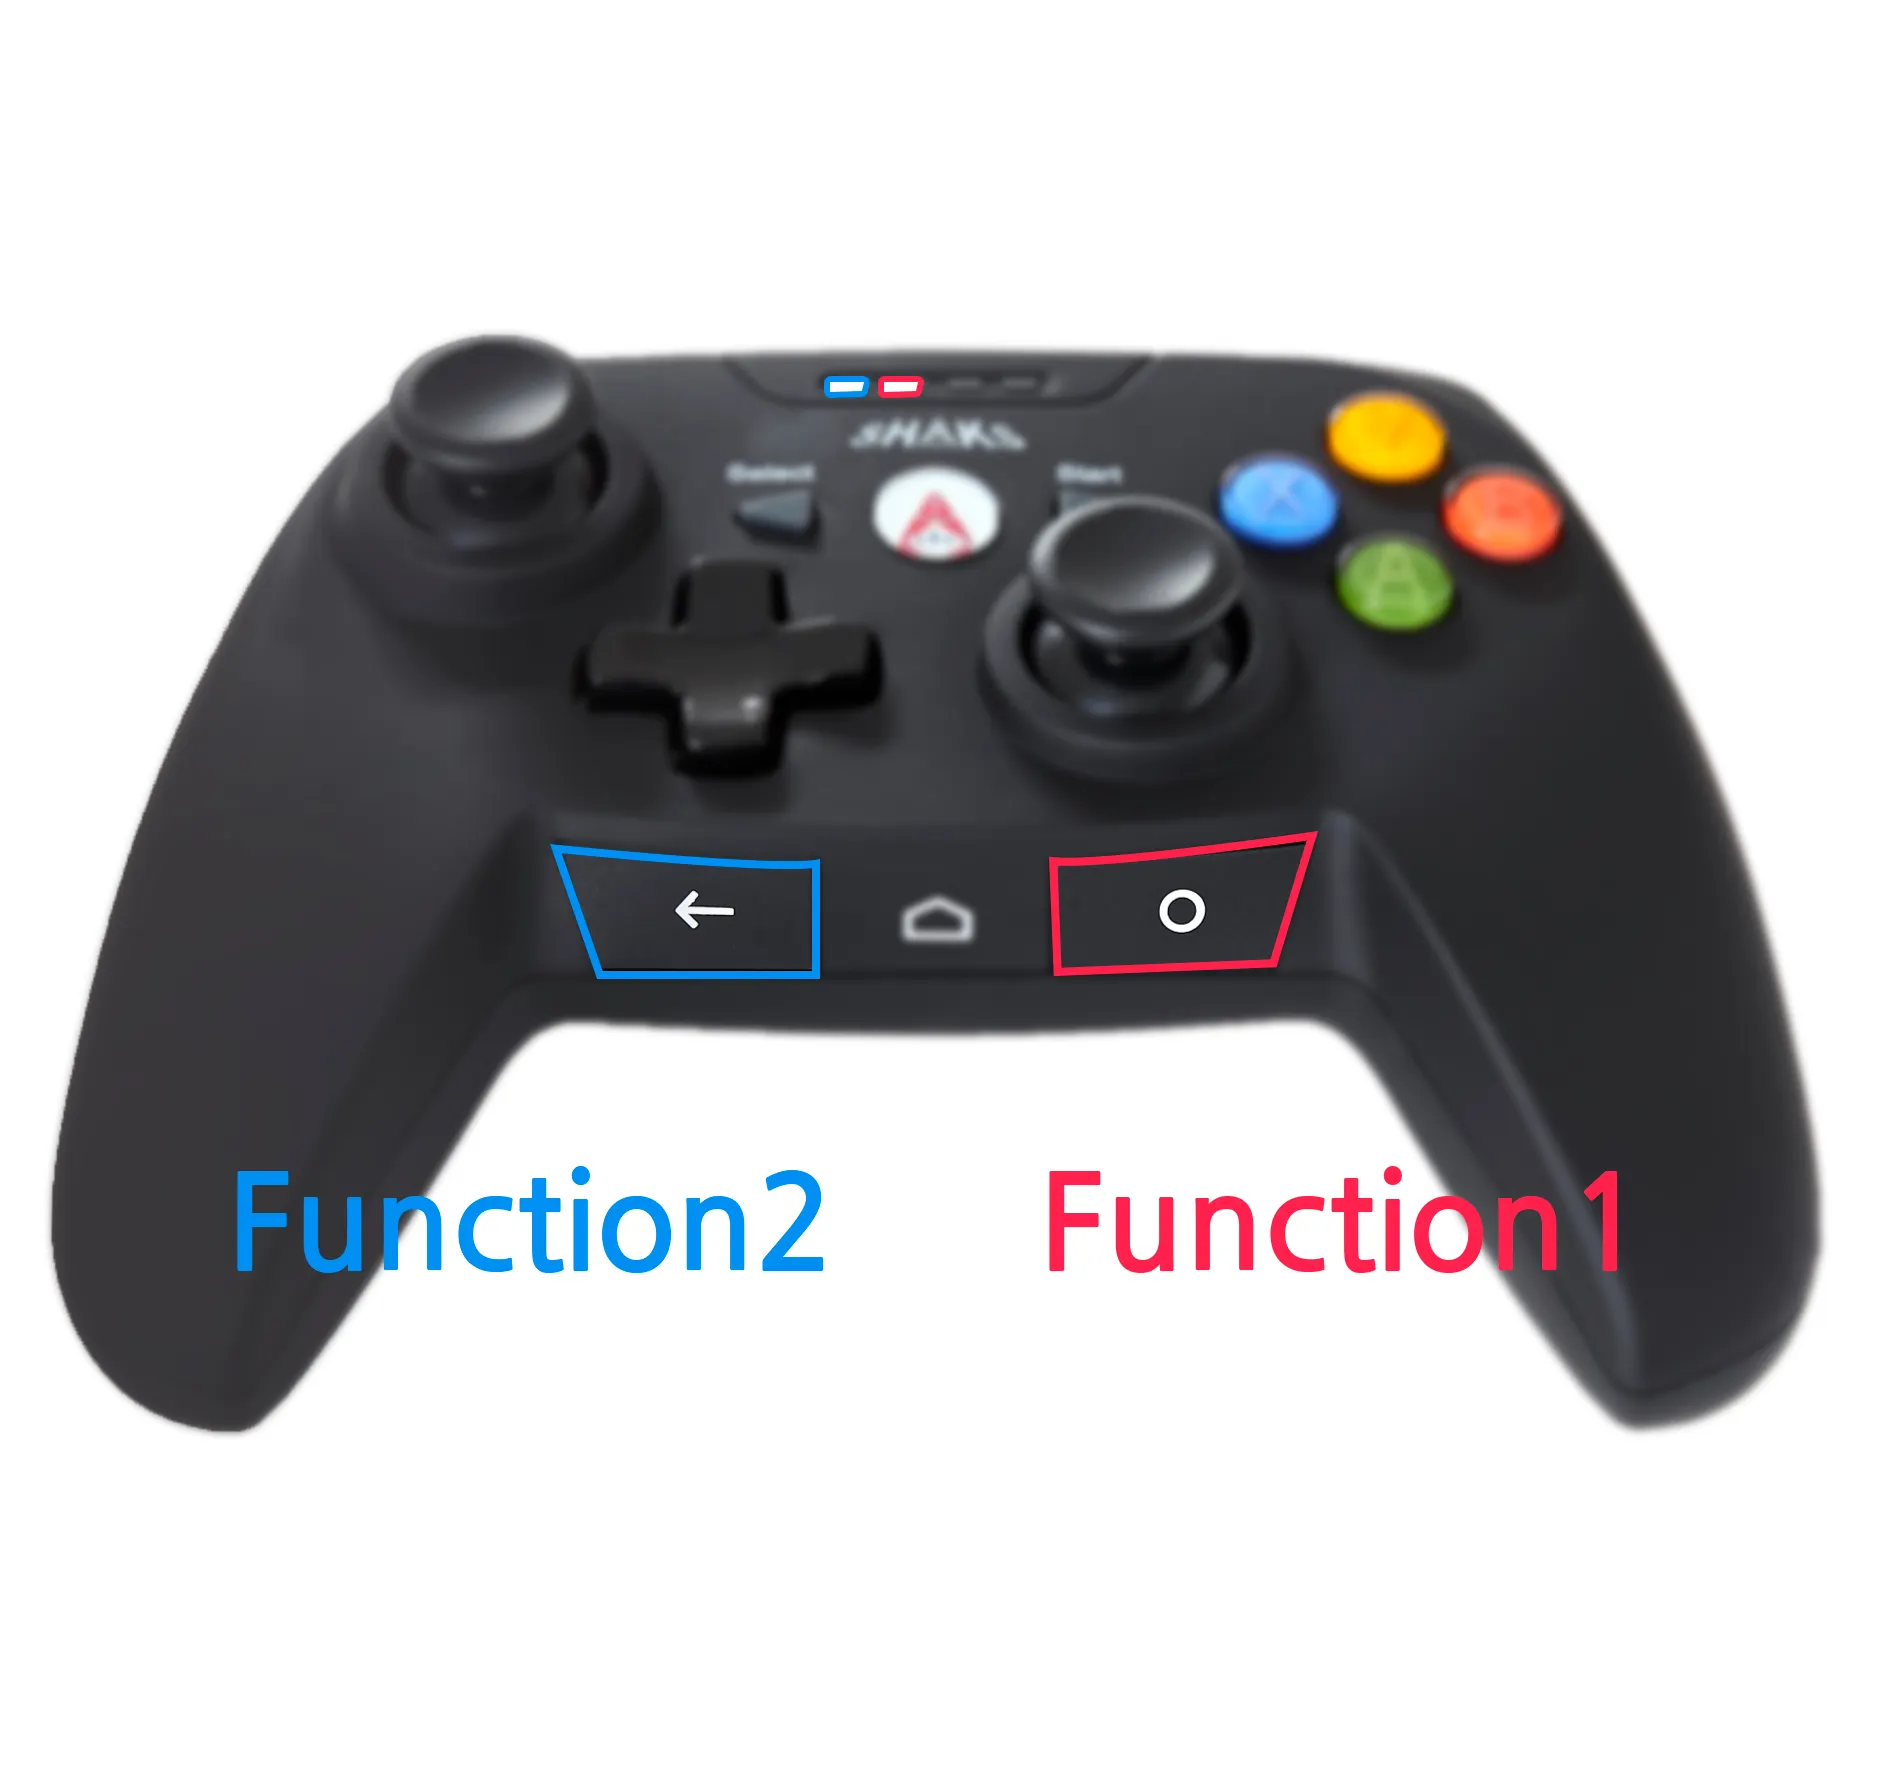
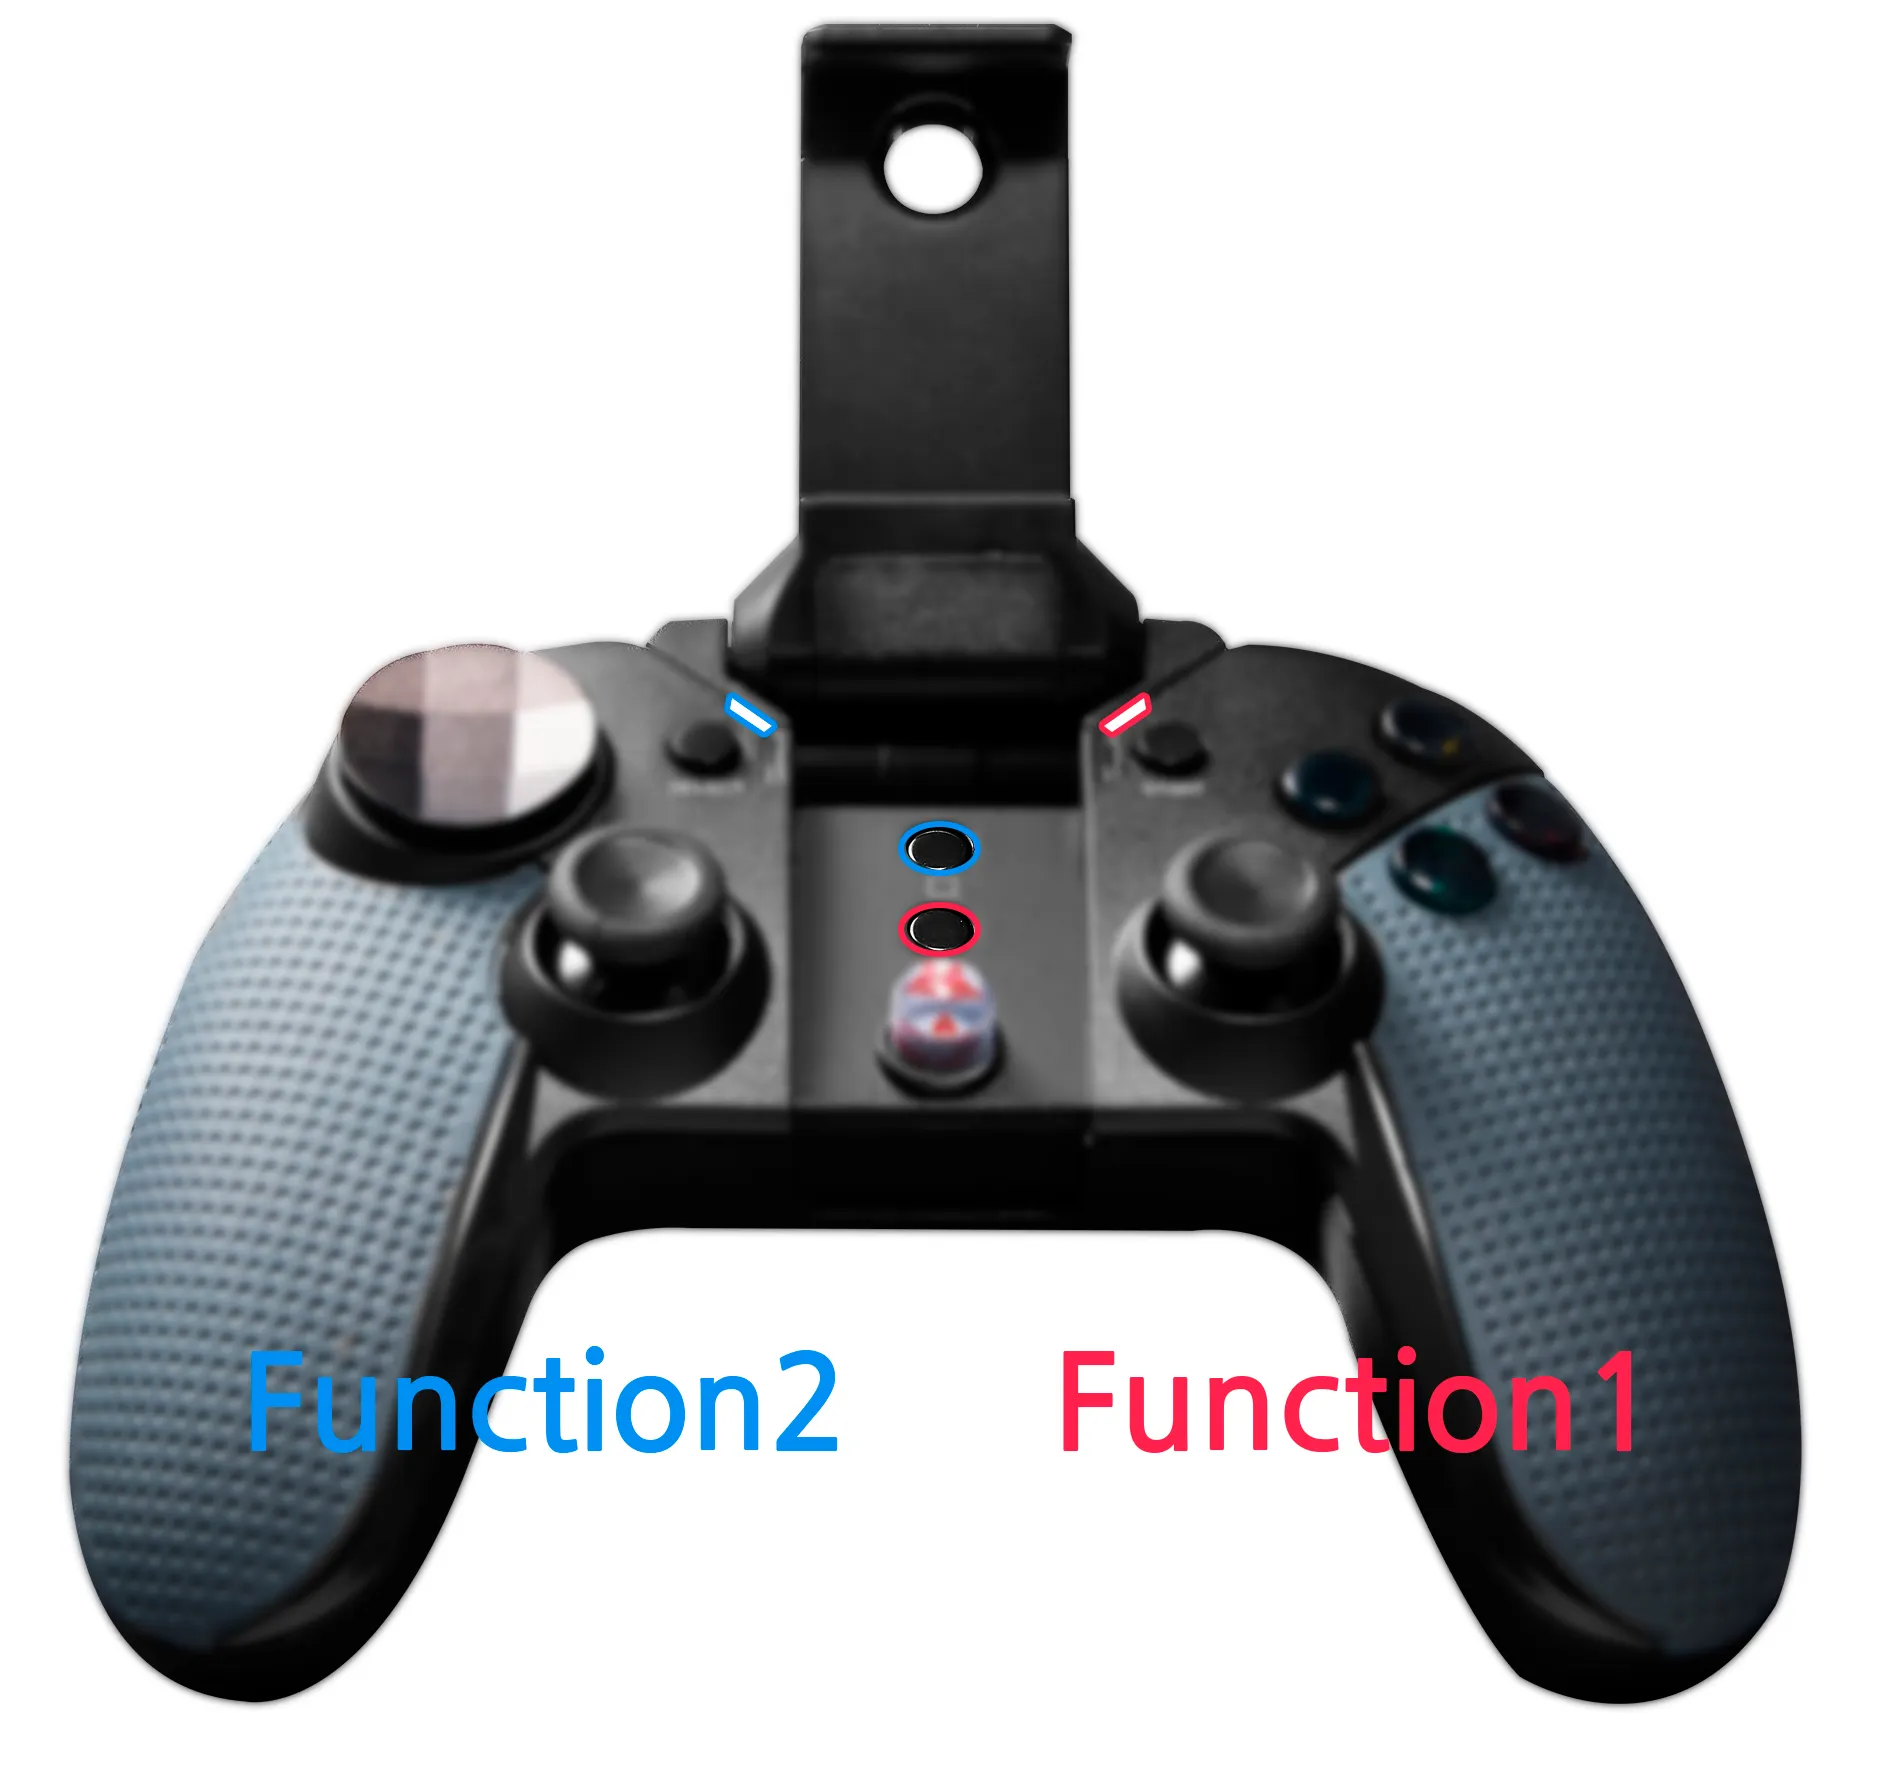
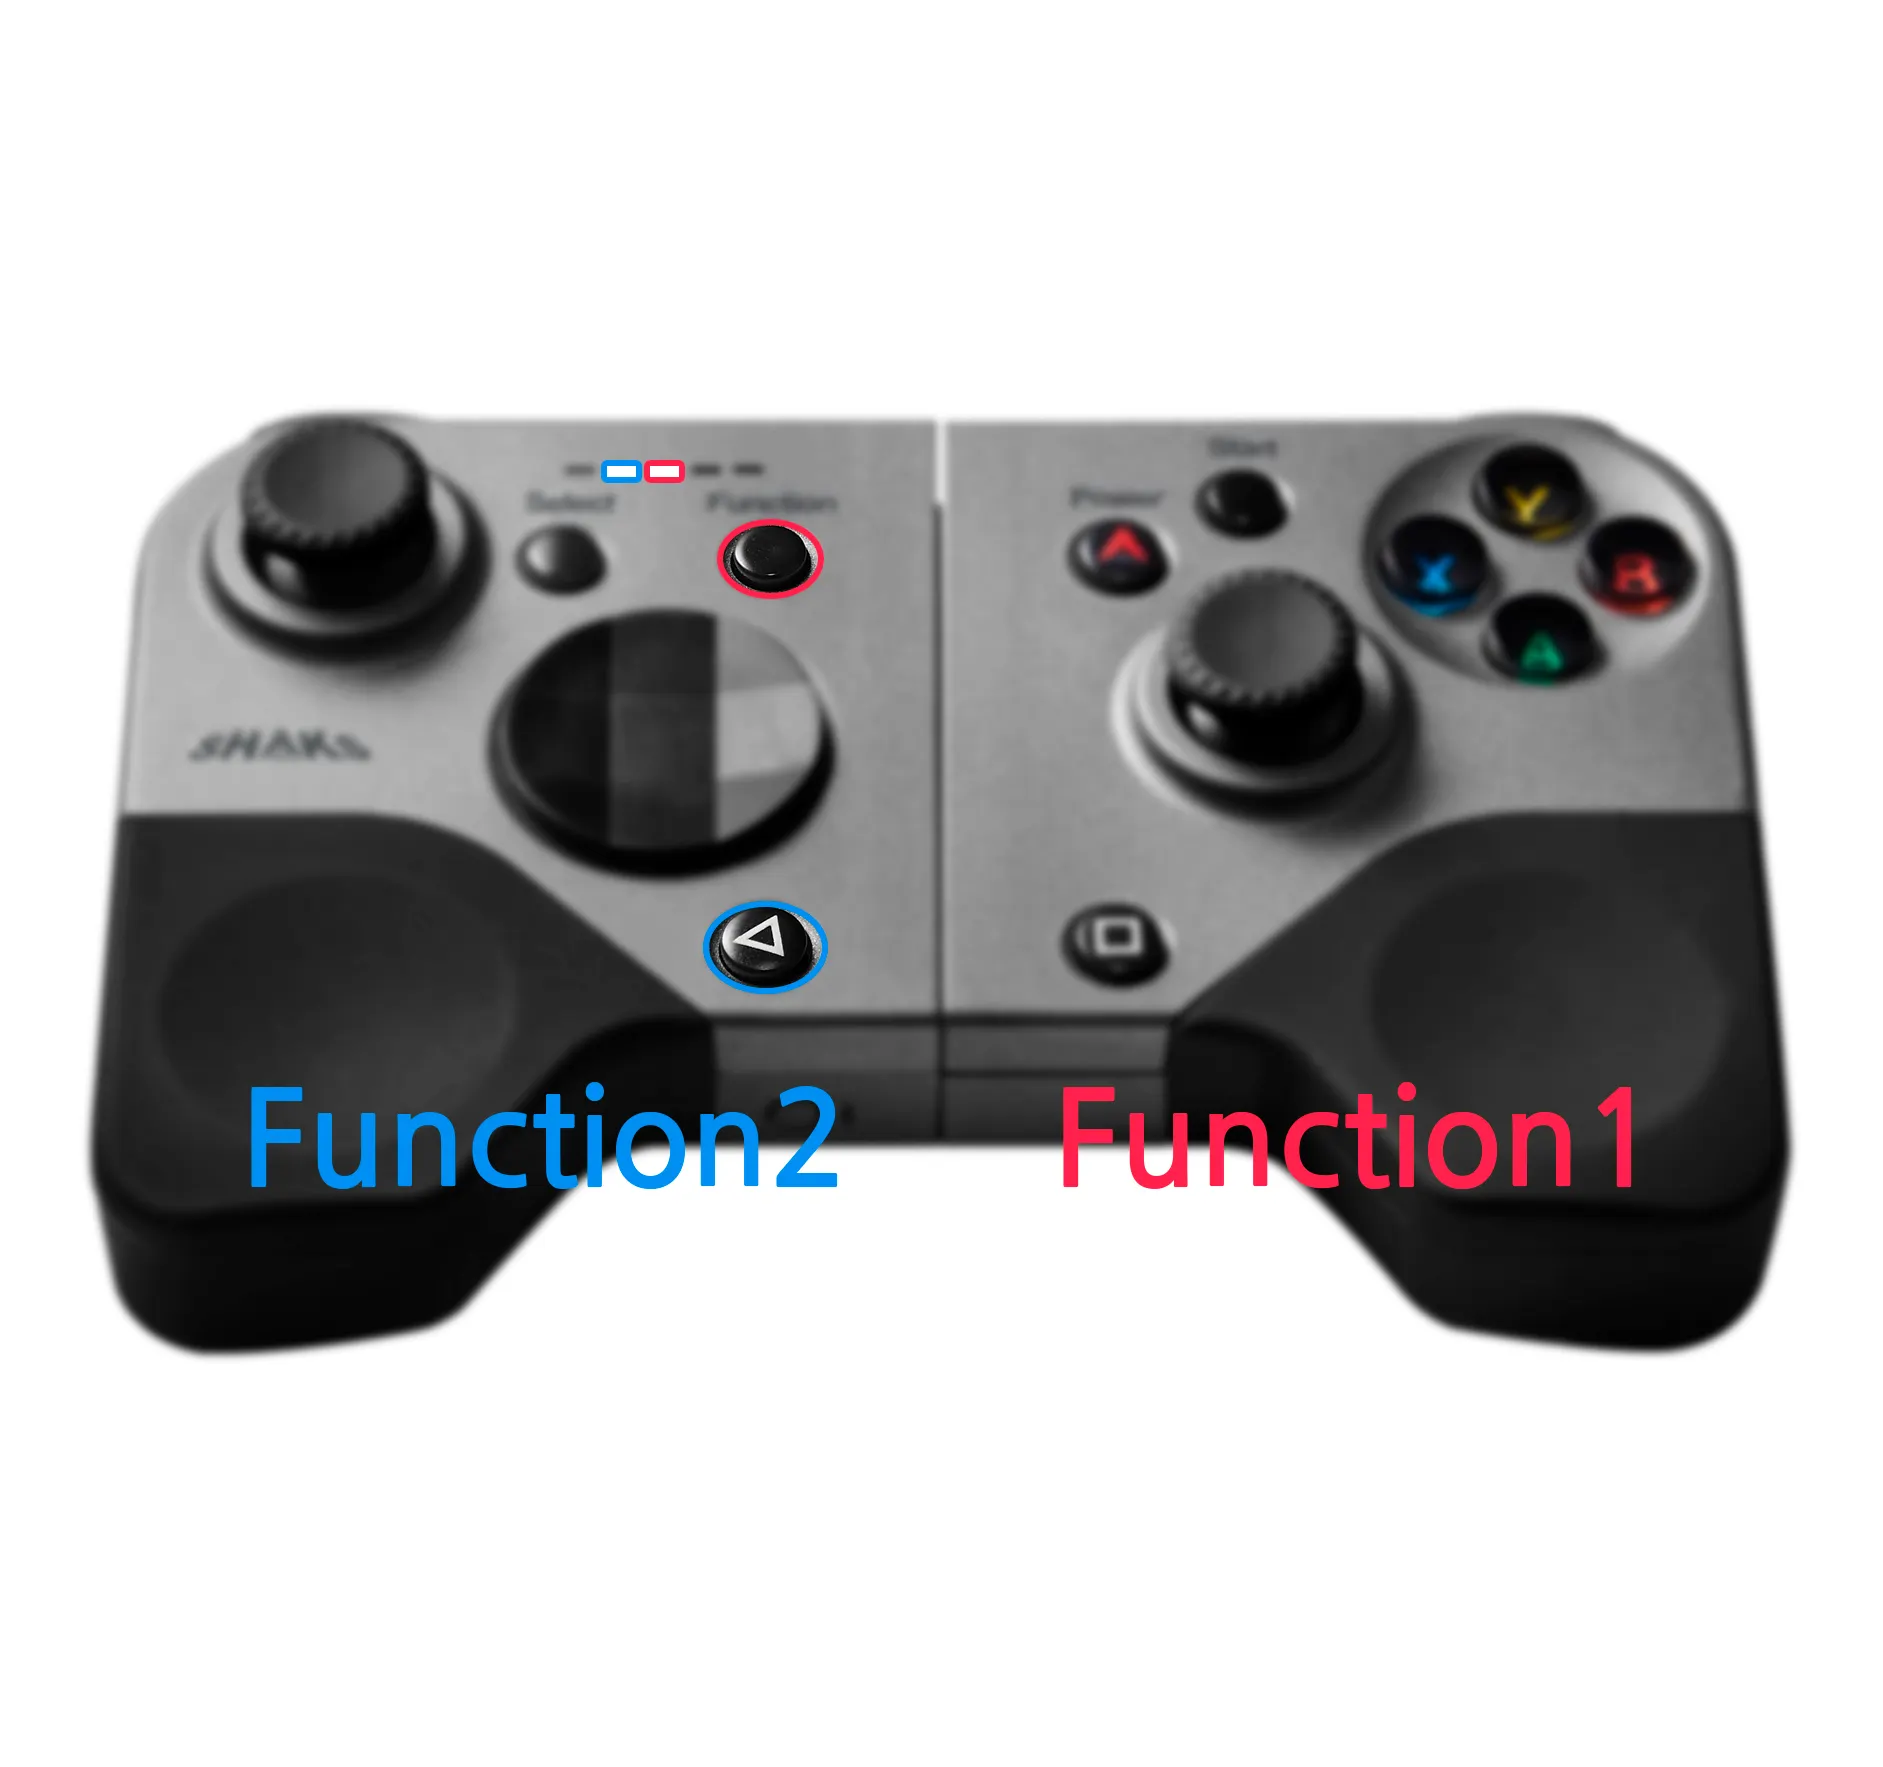
Function Key 1, 2
Function keys are activated additionally with the Function buttons.
Please check each multifunction key button and LED on the gamepad before using it. Please apply the various functions described below to make the game more advantageous.
Some functions can be operated only the latest firmware must be installed. Please be sure to keep the gamepad.
•
Function off
Disable Function button
•
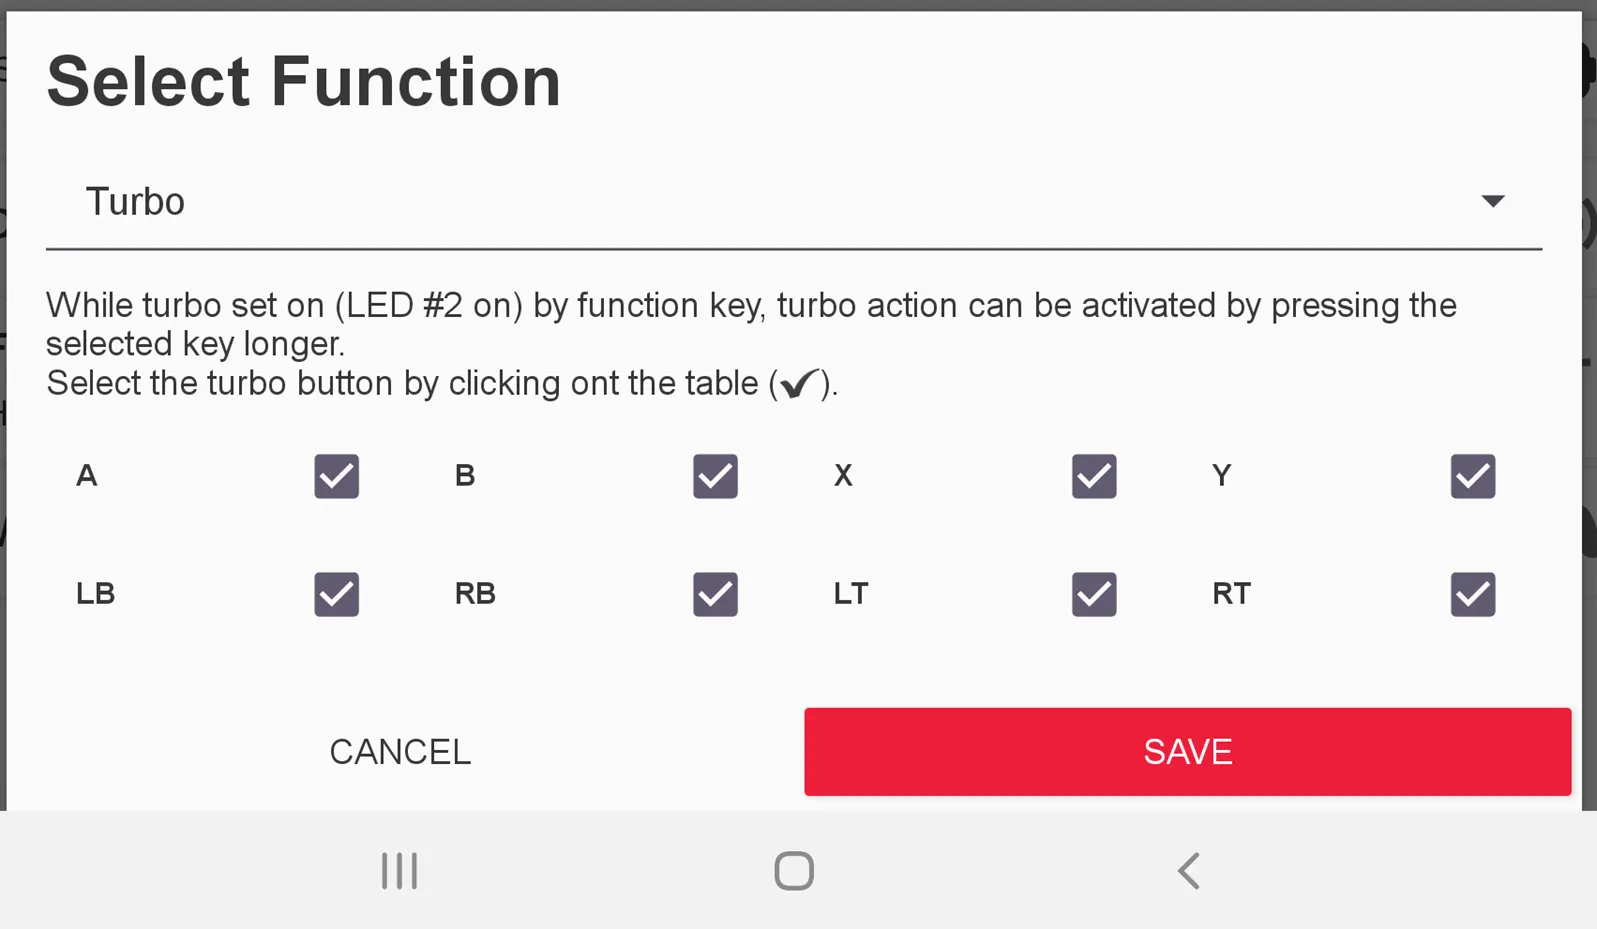
Turbo (Clicking button rapidly)
Press the selected button longer. then turbo action is activated. You can select the turbo button by clicking each box and then OK to store.
By pressing the function button, make LED on (turbo stand-by), then push the selected button for turbo action.
•
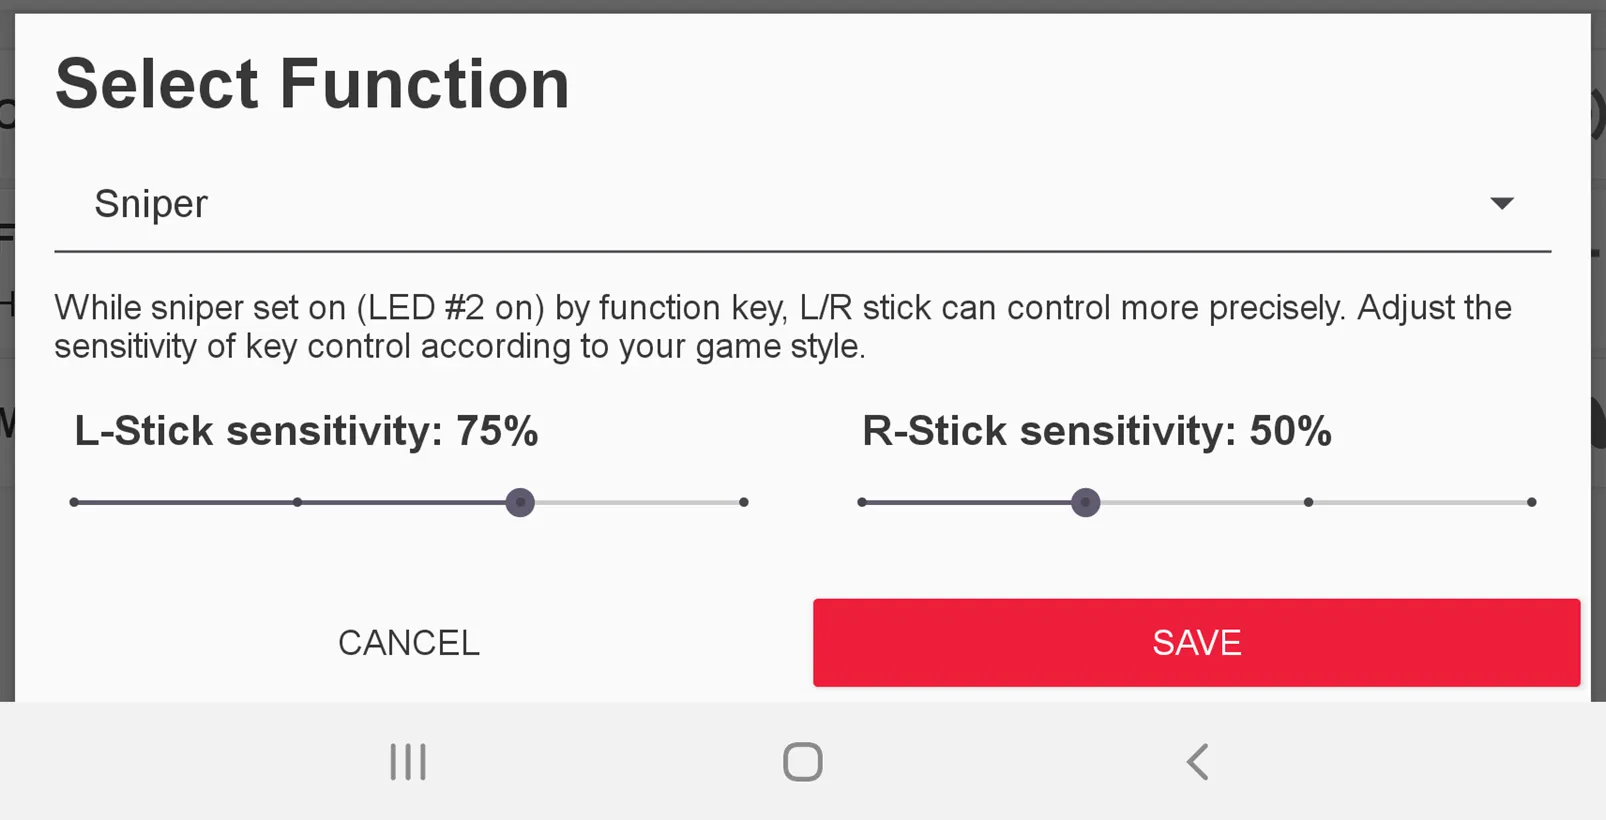
Sniper
When you want to control precisely the L/R joystick, you can set sniper enabled. Adjust the sensitivity of each game scene and your skill.
By pressing the function button, make LED on (sniper standby), then move the joystick.
•
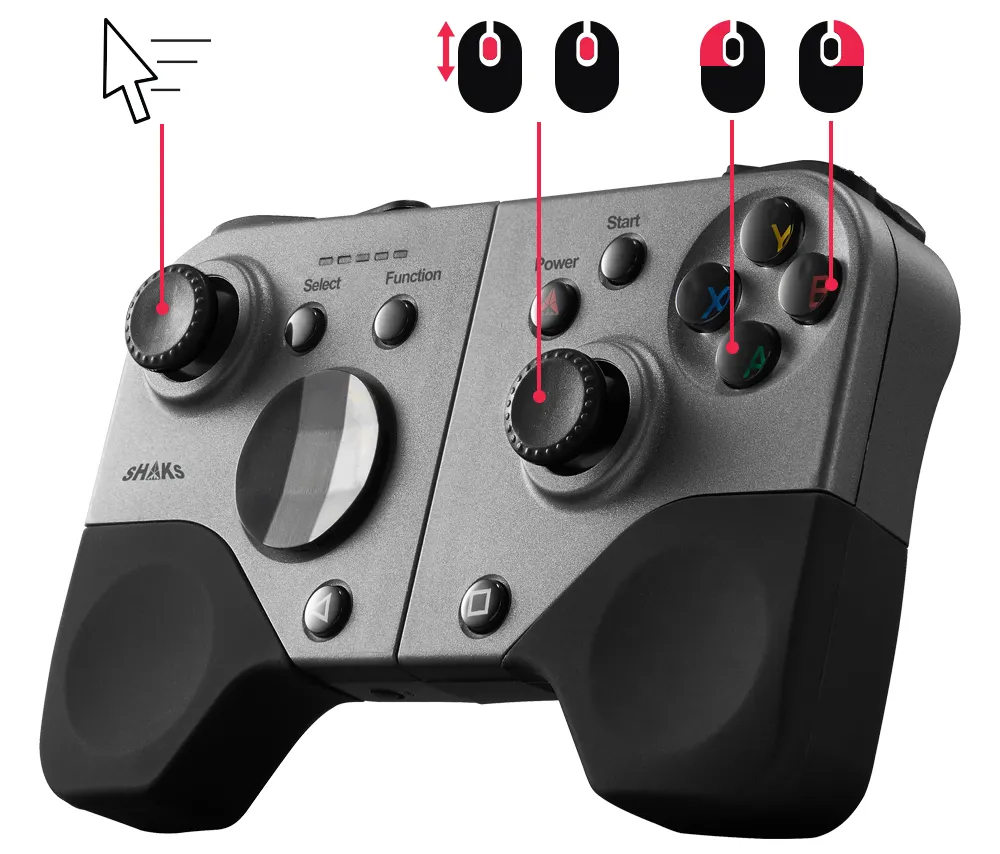
Mouse (available only on Android mode, no support in mapping mode)
By pressing the function button, make LED on, then control the below button and keys for the cursor control
- L stick: mouse cursor moving
- A button: left click
- B button: right-click
- R stick : wheel scroll (up/down/left/right direction)
- R stick: press the wheel button to click
•
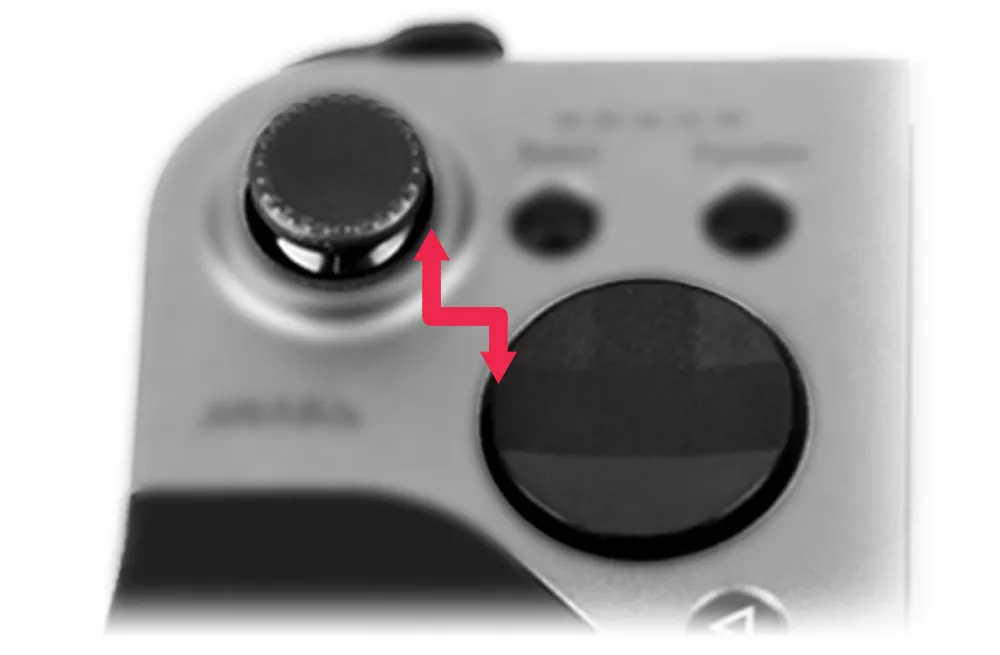
Stick Transition (no support in mapping, iOS mode)
L-Stick and DPAD signals are exchanged.
•
Screen Capture (available only on Android mode, no support in mapping mode)
Take a smartphone screenshot.
Key button is supports Android 8.0 (Oreo) or over. Some models may not be supported.
•
Camera shutter / Volume Up Key
(available only on Android mode, no support in mapping mode)
When the camera application is running over the phone, click this function key to do the camera capture feature. No in the camera app, it works volume up key.
•
Volume Down (available only on Android mode, no support in mapping mode)
Turn down the Game/Media sound.
•
Call receive and media control (available only on Android mode, no support in mapping mode)
By the function button, you can receive incoming calls, or music/video playing, pause, and resume features.
•
Home Button
Go to the home launcher screen.
•
Back Button
Set to Back Button.
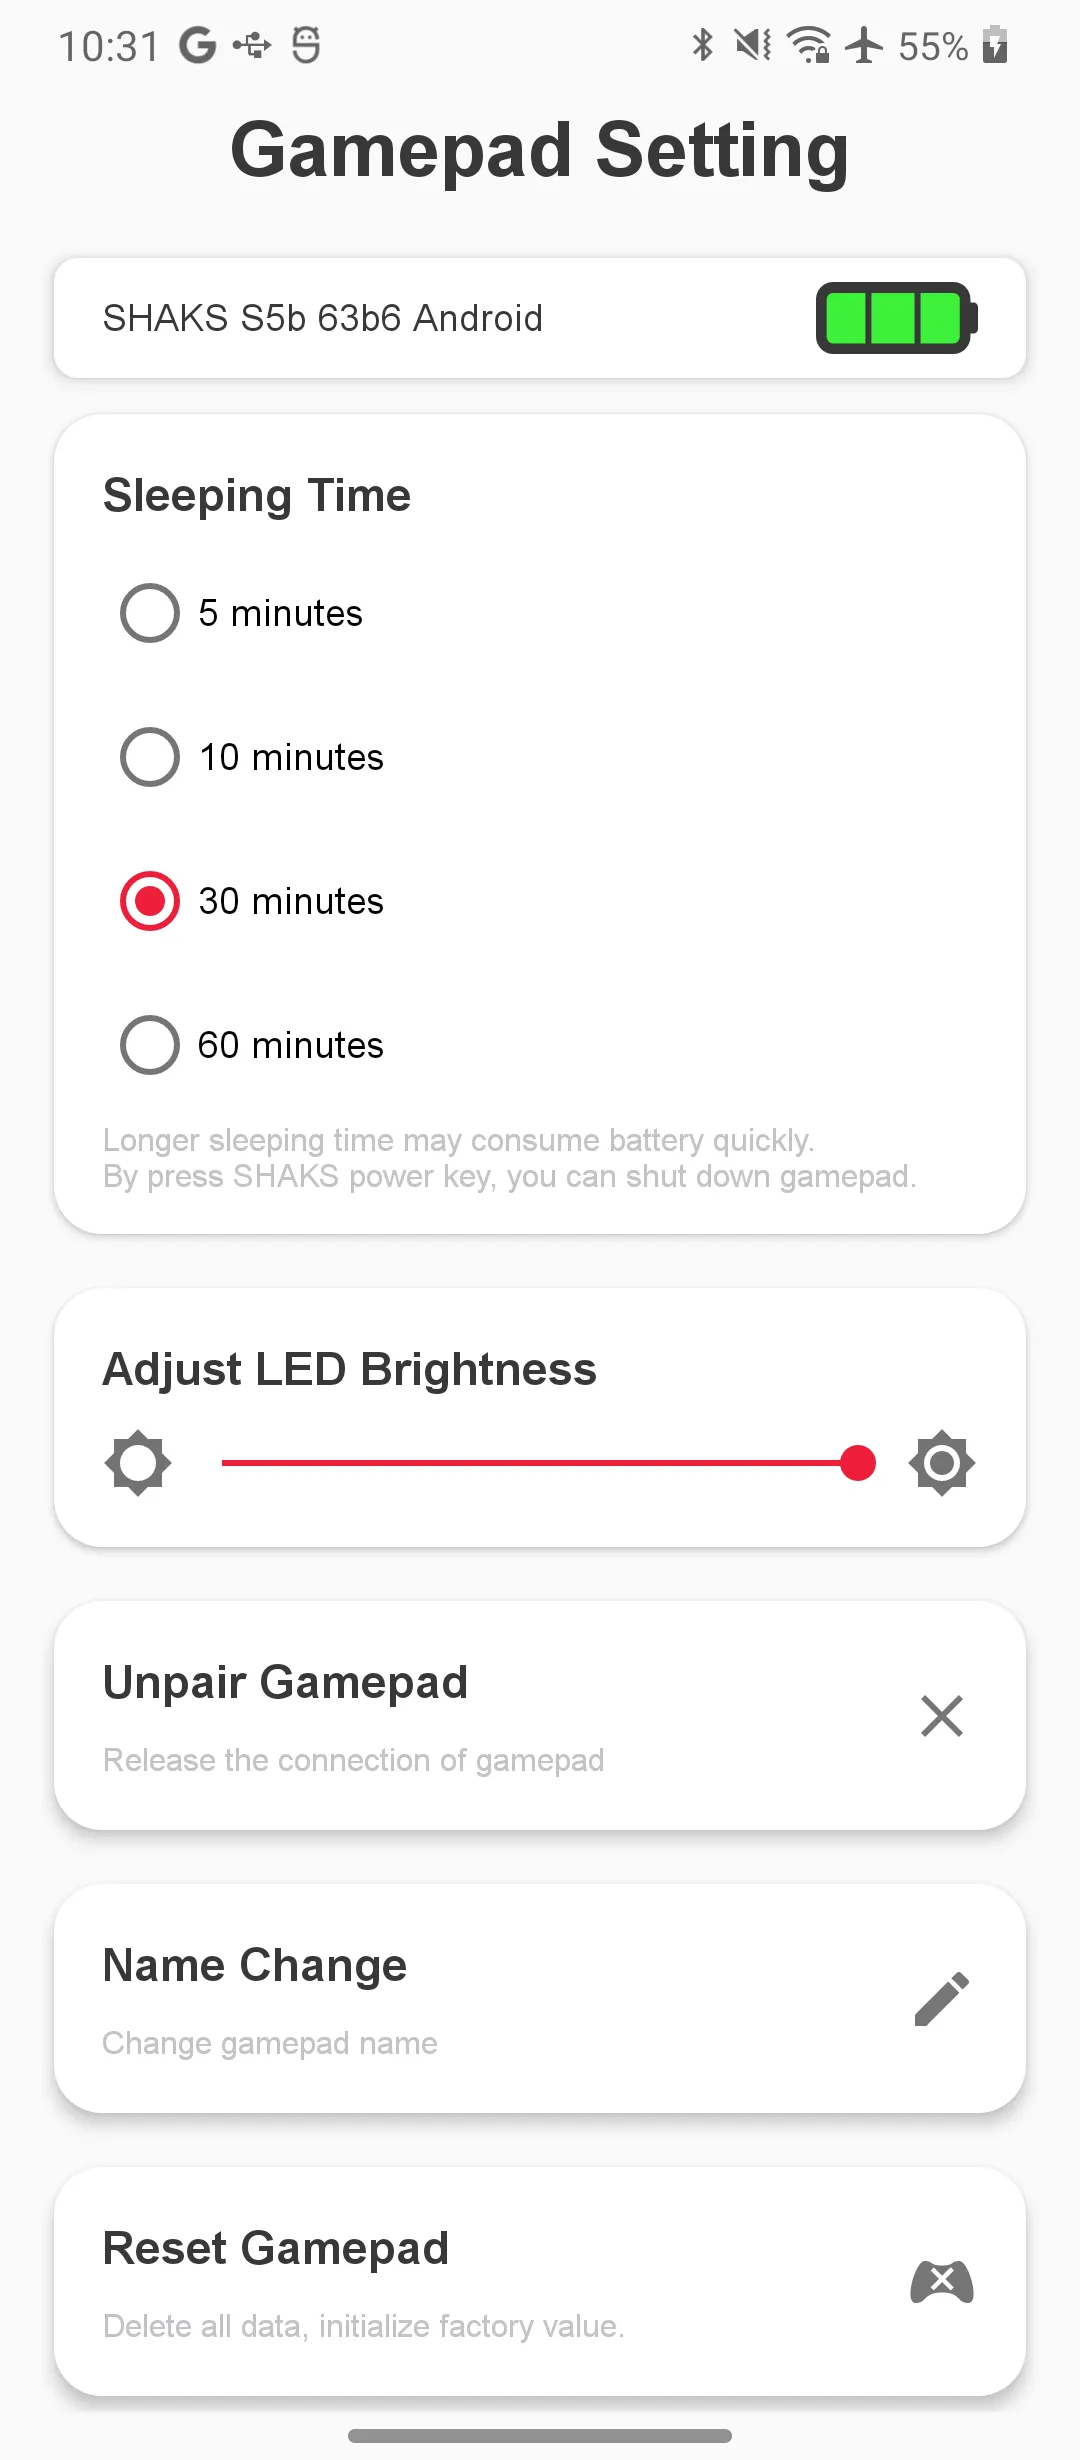
Gamepad Setting
You can set power-save sleeping time, LED brightness, calibration stick & trigger keys, and naming of the gamepad
•
Sleeping time: 30 min is the default value, can adjust it to 5,10, 60 min.
•
LED Brightness: Adjust 15 steps, but no allow to switch off completely
•
Unpair Gamepad: Release the connection of gamepad with the Android device.
•
Rename the gamepad: Select one of pre-set names or put your own name on the gamepad
- Basic
- Xbox Wireless Controller
- Microsoft X-box 360 pad
- Customize the name
Once the name is changed, the connection will be released. Please make a new pairing under the new name. (BT profile initializing : S2/S3 press "Start+Select", S5 "BT trigger" key for more 6 seconds.
•
Initializing gamepad: Delete all stored data including the connection log. Please use this option in a critical case. To activate this feature, press the button for long seconds.
•
Factory Reset: Come back to the factory value set.
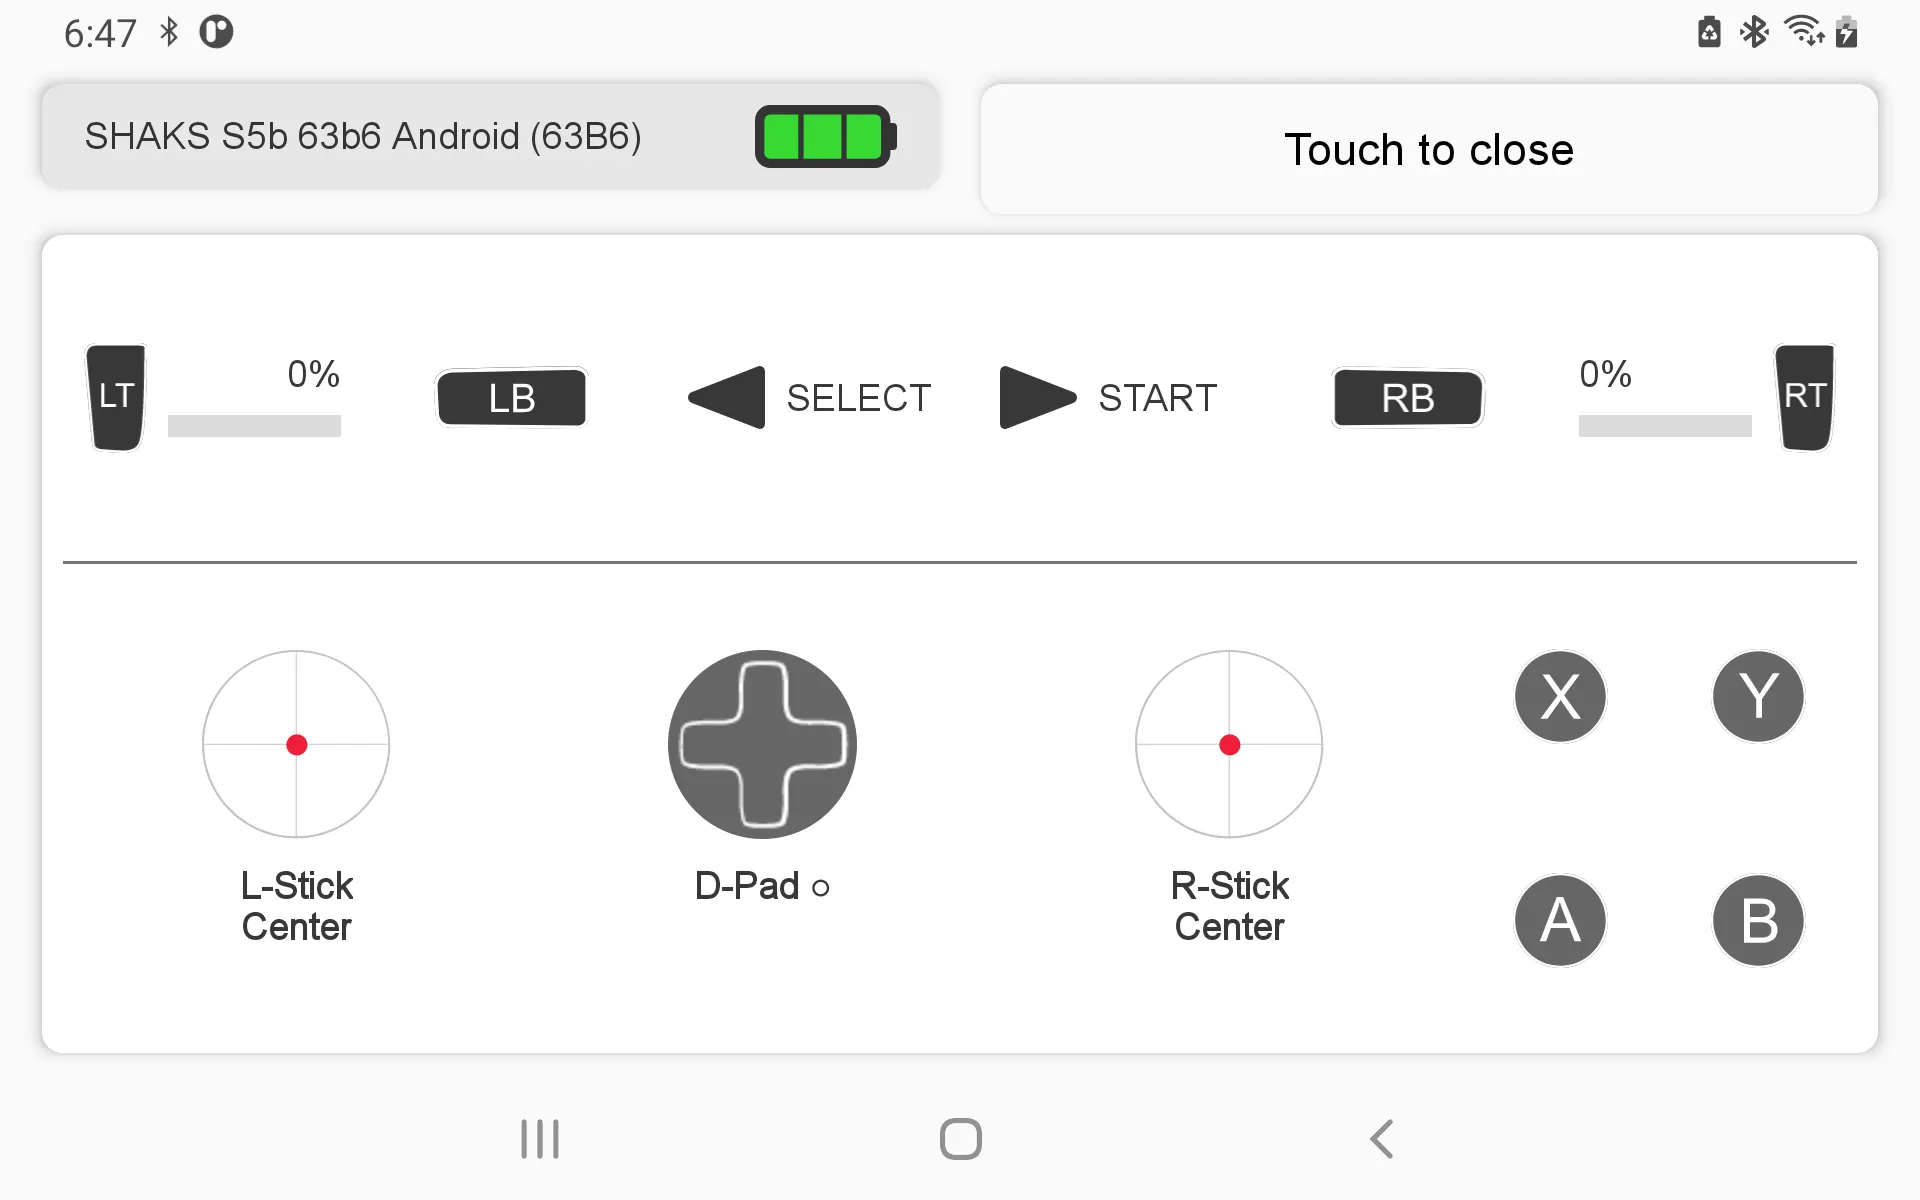
Gamepad Test
Various keys and buttons can be tested. If you think there's a problem with the key's behavior during use, please check it out here.
Both buttons and sticks on the game pad do not work:
1.
Smartphone setting → Touch to close → (installed) Please check the service item.
2.
Turn off the auto-click app in the installed service or any app that provides the ability to change remote control, button functionality, or turn off any service that is working as much as possible if you are unsure.
3.
Turn off the game pad and turn it on again to try it, or reboot your smartphone and try it again.
Firmware Update
SHAKS keeps developing a new feature, please use this feature to get your gamepad up-to-date. If there is a new release, a pop-up guide appears.
For safety updates and to protect the device, update allow only in case of power plug-in by cable to an external power source.
FAQ related Firmware (FW) update
Guide Menu
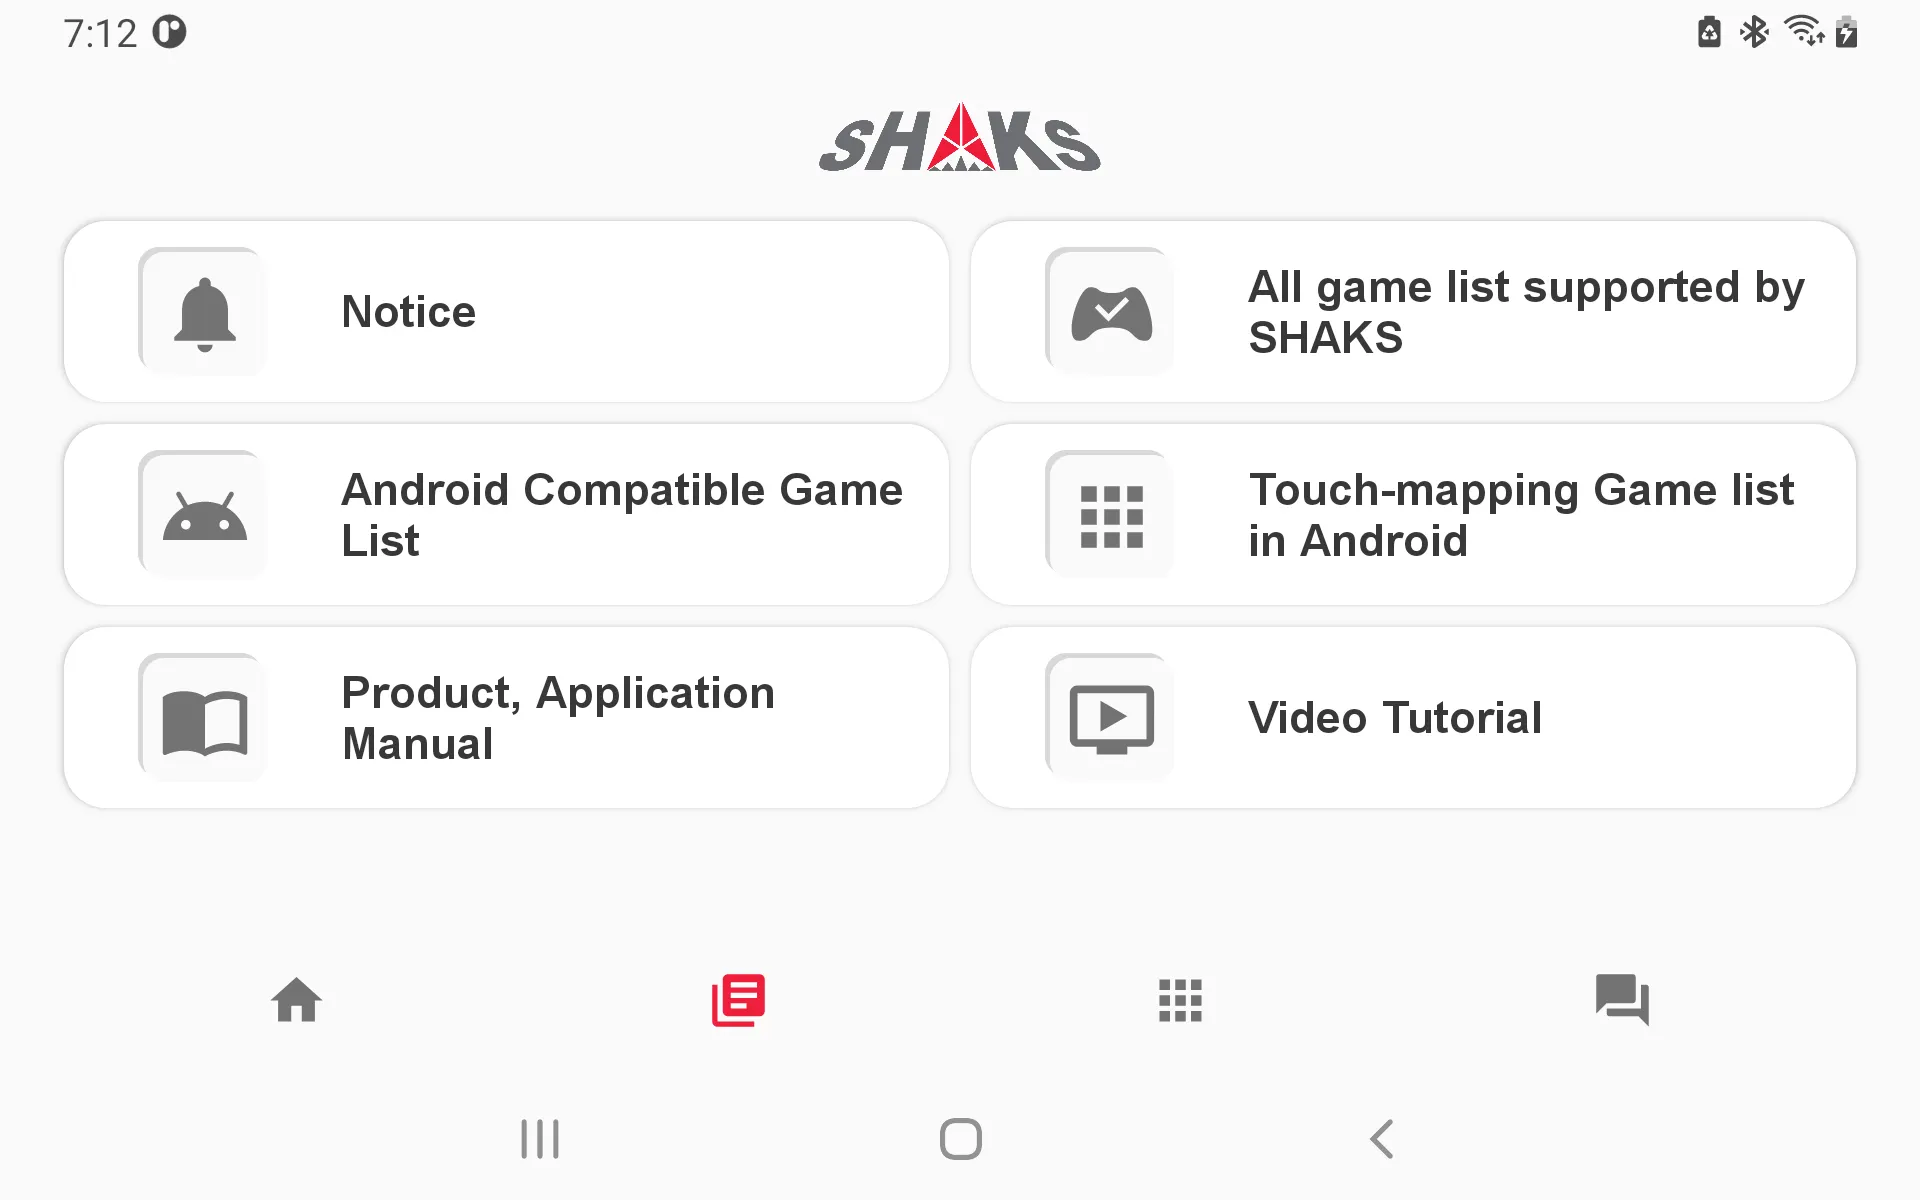
You can find the information you need for any product family that can be prepared regardless of the connection of the instrument.
You can open the gamepad manual or check the video guide.
•
Displayed content can be updated arbitrarily.
•
You must be able to open an Internet browser on your device.
Gamehub 
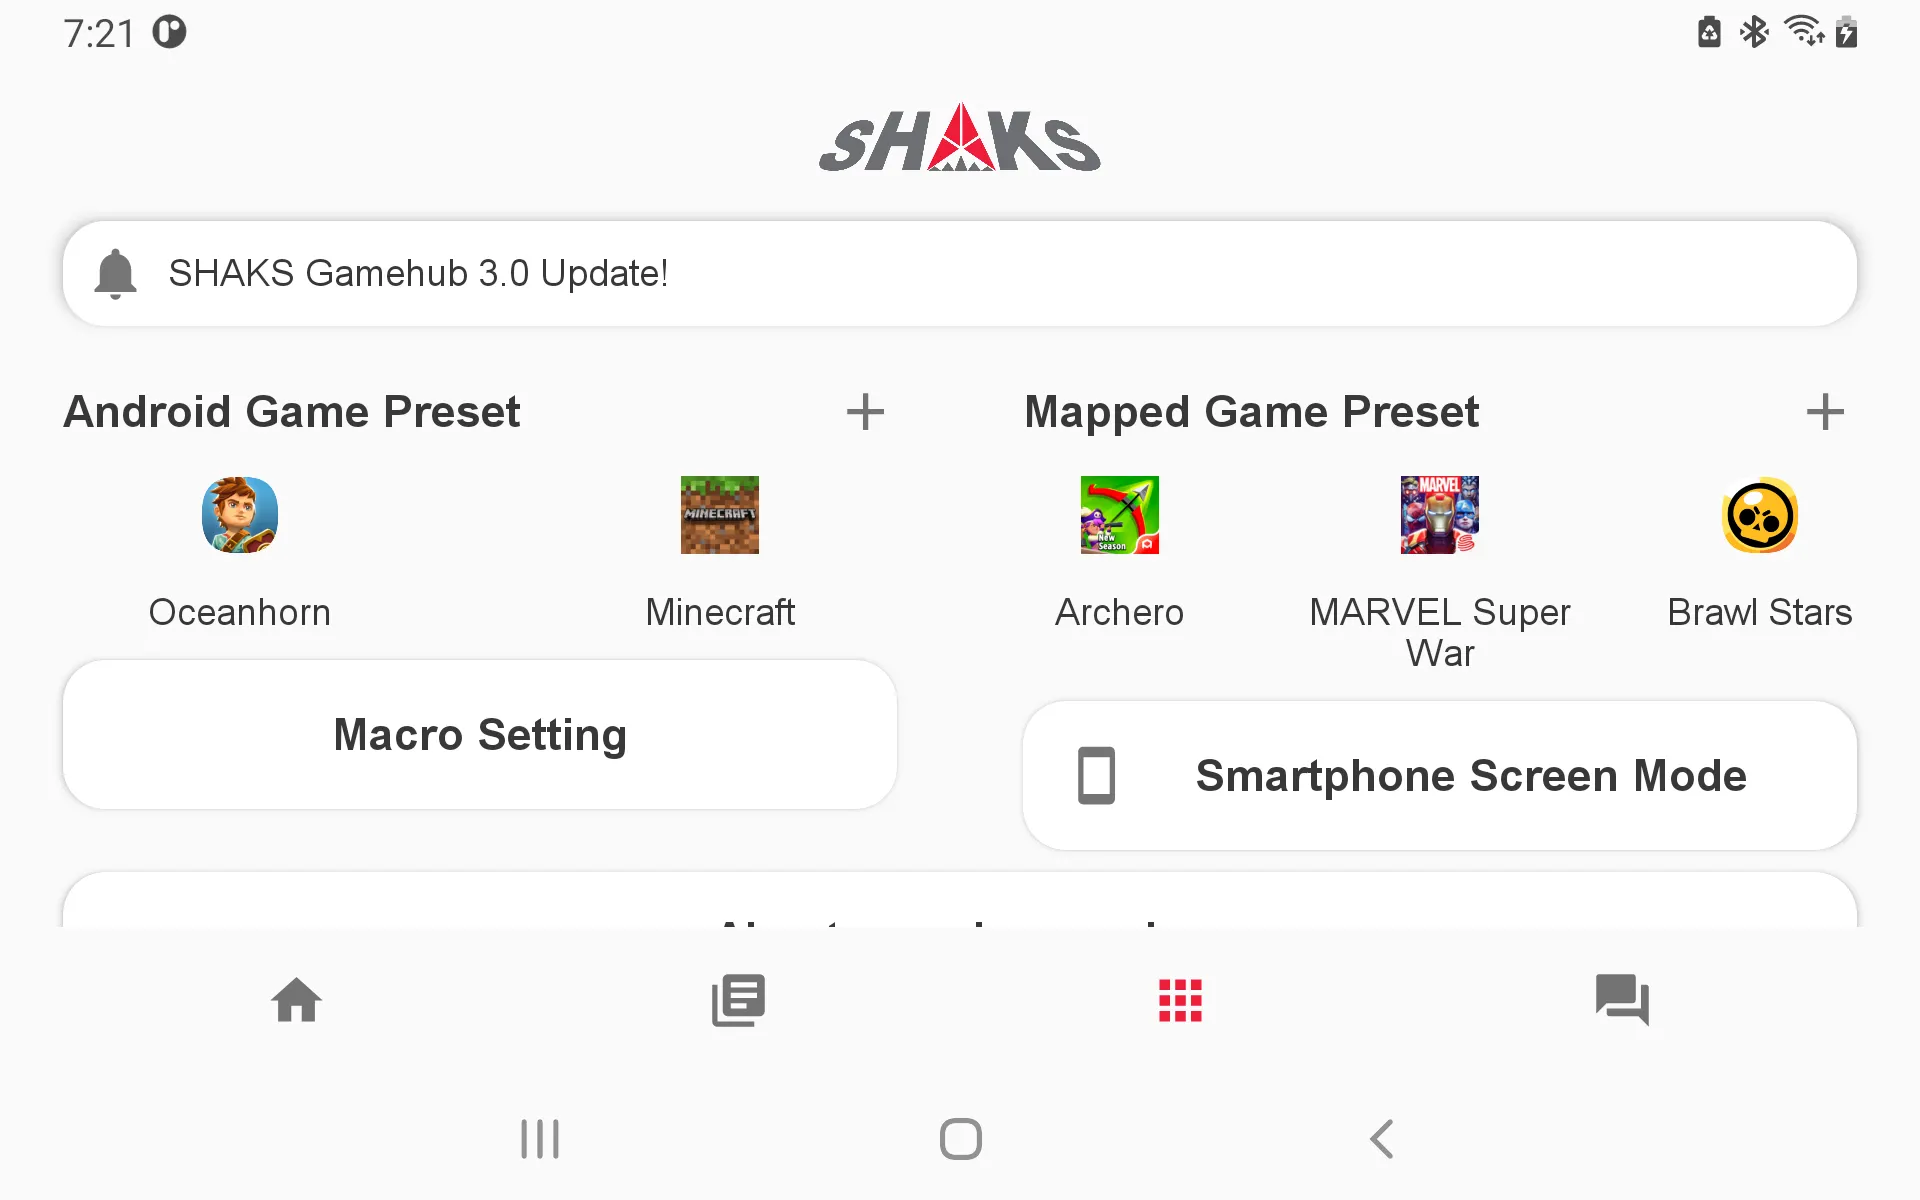
Android Game / APP Preset 
Now, you can run the Android app with the option you want.
Please check the document below.
Macro Setting 
When using the Android game app preset, you can collect and manage only available macros.
You can use it to create new macro data, edit information about registered macro data, or delete it.
Please check the manual below.
Mapping Game/ APP Preset 
Enhancements have been made to take advantage of mapping capabilities.
Please check the manual below.
Be sure to check before using the mapping service feature!
1.
2.
If you are not connected to a TV, select "No, I use this device.". Please check that it is 'Smartphone screen mode'.
Customer Service
•
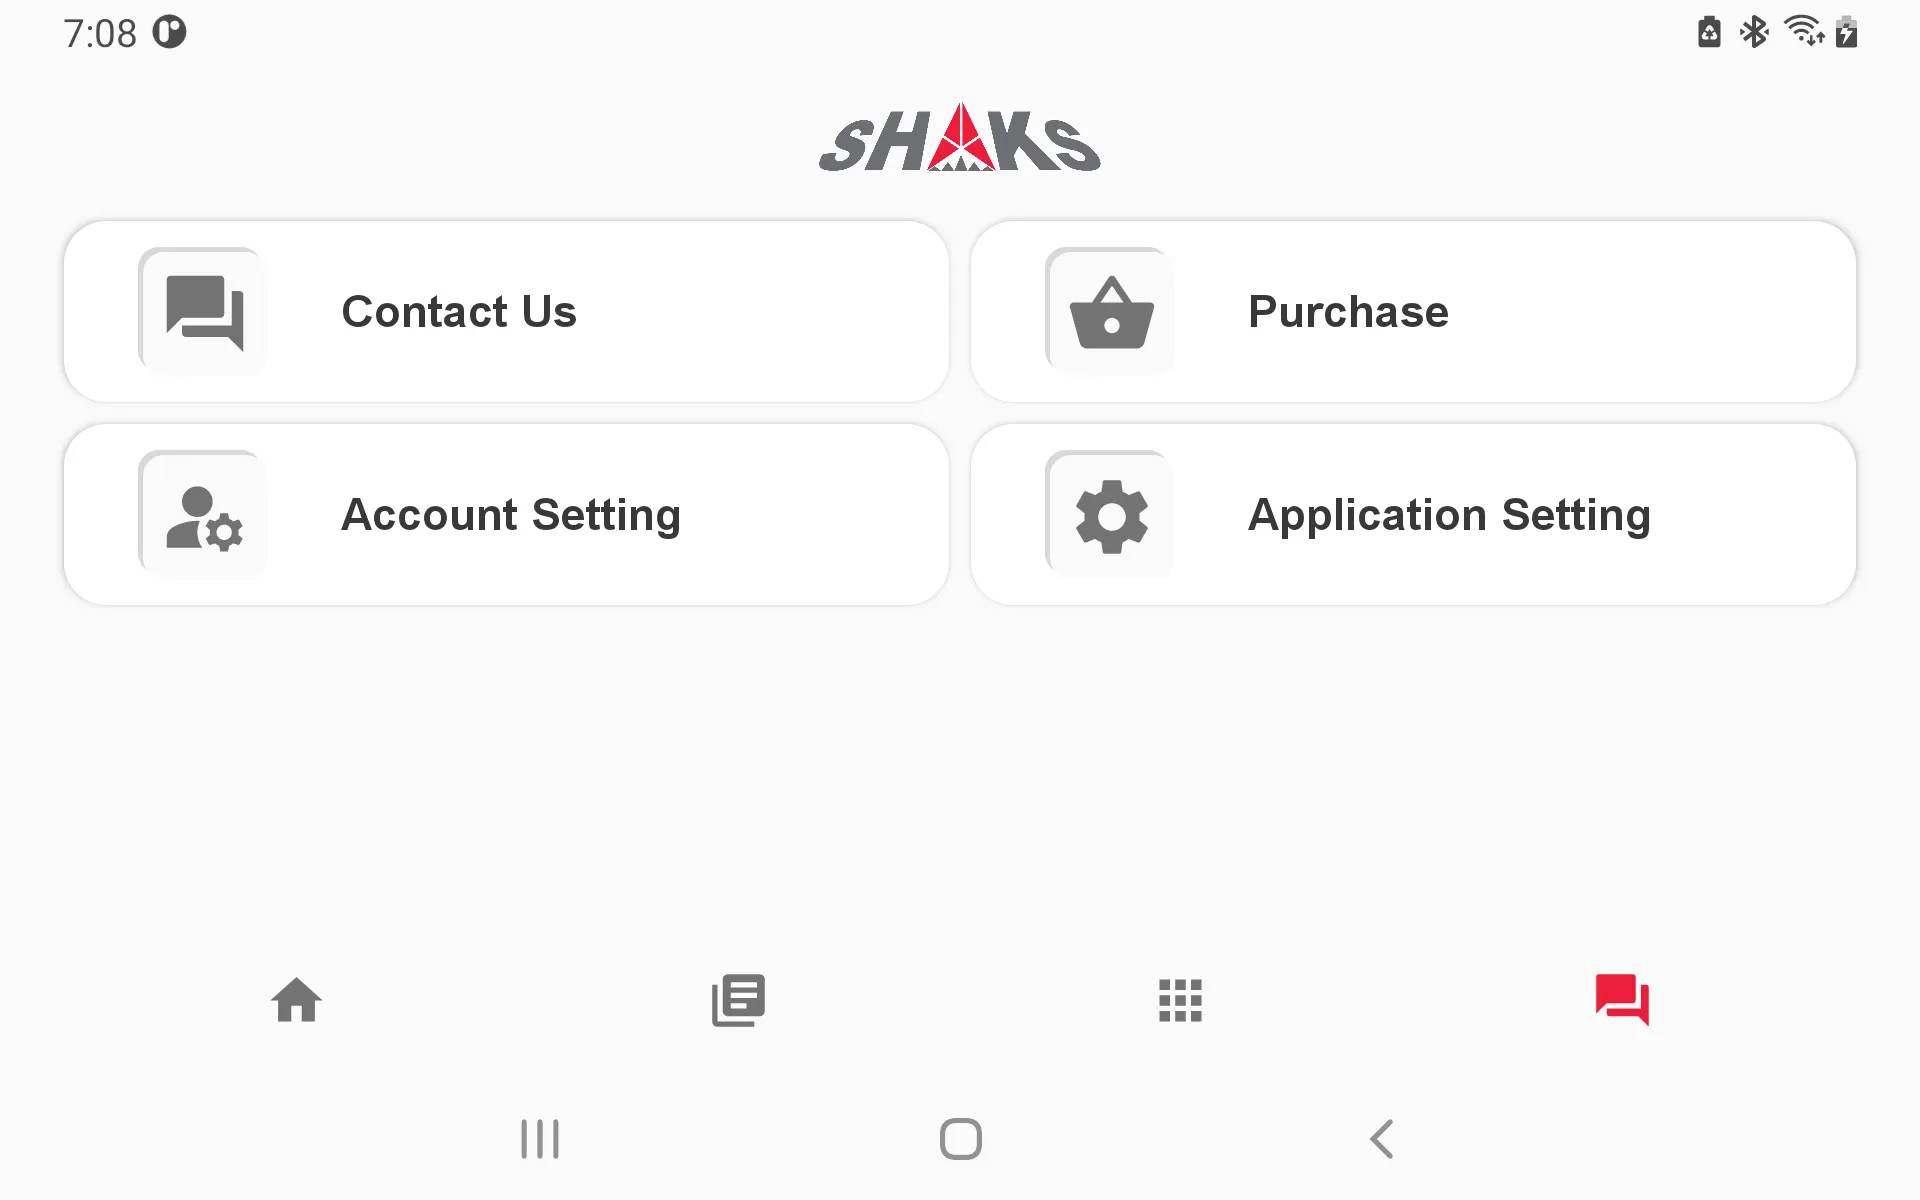
Contact Us
Inquire about using applications and products.
•
Purchase
A link to purchase a product.
•
Account Setting
Update the user information.
•
Application Setting
Setting for the application.
Account Setting
1.
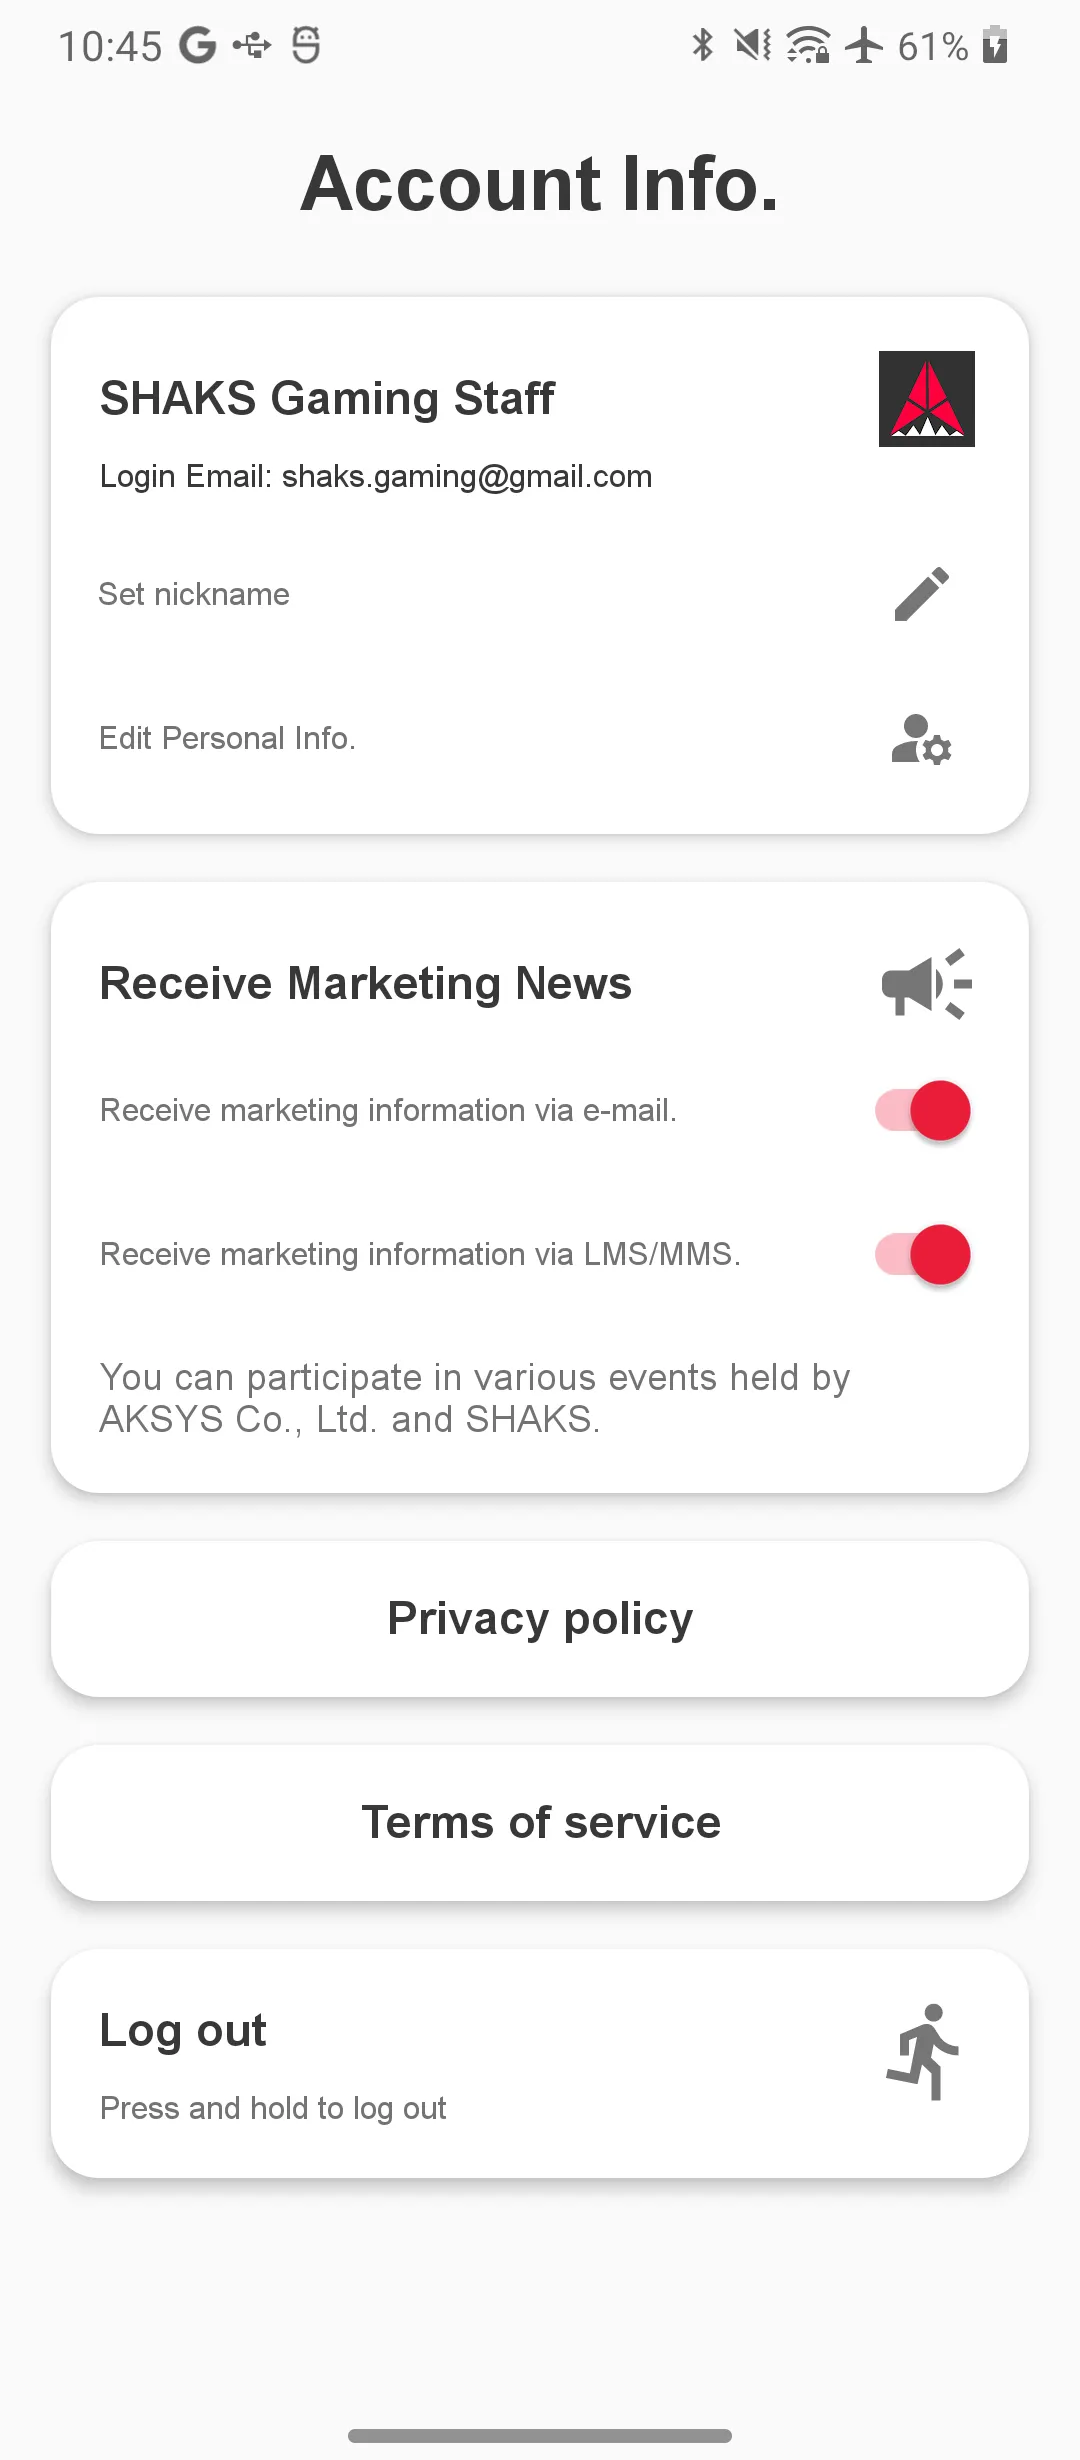
Set Nickname
You can reset your nickname. When changing a nickname, you must specify a new nickname that does not overlap with the existing name.
2.
Edit Personal Info.
Consultation is possible to modify the customer information (customer name, phone number, email, delivery address, etc.) used for consultation.
3.
Receive Marketing News
Choose whether to receive new news from the Sharks Game Hub. The picture shows that the two options are activated.
•
Receive marketing information via e-mail.
•
Receive marketing information via LMS/MMS.
4.
Privacy Policy
5.
Terms of Service
6.
Account Logout If you don't want to continue using the account you're currently logged in to, or if you want to log in using a different Google account, you can log out. If you log out, you must log in again to use the app again. You can log in using a different Google account.
Application Setting
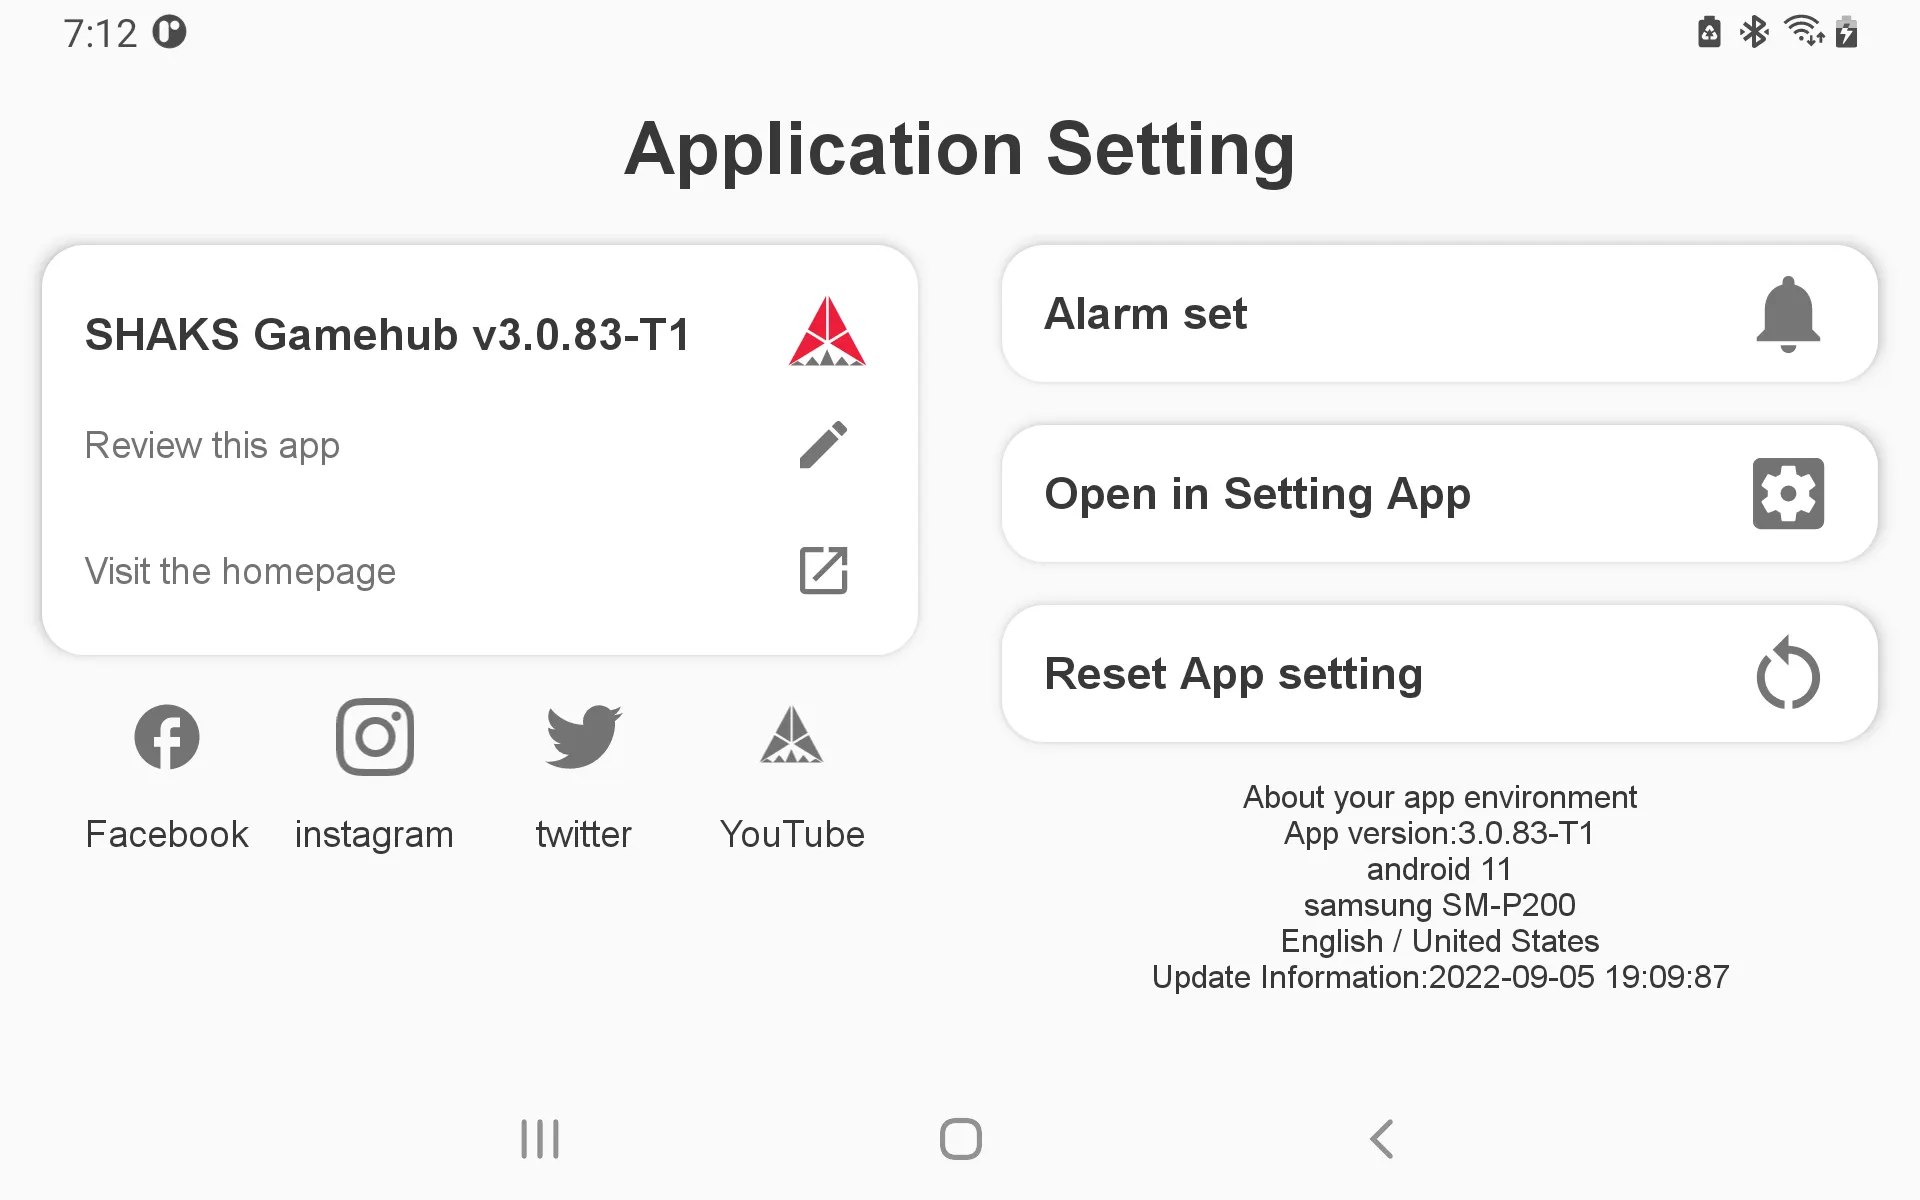
•
APPLICATION VERSION
You can check the application name and version.
•
Review this app.
◦
You can leave your review of the application directly on the Play Store.
•
Visit the Homepage
◦
Visiting SHAKS Homepage.
•
SNS
◦
Visiting SHAKS SNS pages.
•
Alarm Set
◦
Setting application alarm messages.
•
Setting on top of another app (showing only Android 9 Pie or lower version)
Resolve problems caused by the icon not appearing on the screen when using the mapping service function.
•
Open in Setting App
You can manage many things that need to be managed directly by the system, such as Bluetooth settings or display settings on top of other apps.
•
Reset App setting
Initialize various information set within the app.
About the data being deleted.
Please check it out and delete it when you need it.
1.
Initialize app settings: Delete pop-up information messages and records related to recently used information among what the app remembers.
2.
Open in Setting App → Storage & cache → Clear Cashe: Delete only various image picture data and temporary files in the app.
3.
Open in Setting App → Storage & cache → (ALL) Clear Storage: Initializes all app usage records corresponding to app reinstallation. Mapping preset data, Android preset information, and macro information are all deleted.


